Here’s a Sketchfab link, in case you want to see it in 3D:
After browsing around the web one night, I decided to do a render of some kind of video game console. I was feeling a bit inspired by the art of Arne Niklas Jansson, which a friend had introduced me to not long ago, as well as some renderings by Jonathan Ball/Poked Studio. I opened up Blender and started free-handing a handheld game console, not really worrying about the proportions, scale, or really much of anything. It’s not always easy to do, but going freestyle and just exploring an idea is almost always a good experience for me – with Blender, with a pen and paper, or just about any tools which can produce art.
Anyway, a few hours later I had a basic handheld video game system sketched out. It had the general shape of an old-school GameBoy handheld, but without all the compromises practicality would impose. I threw some simple lights and materials in, placed it on a backdrop, and rendered it:
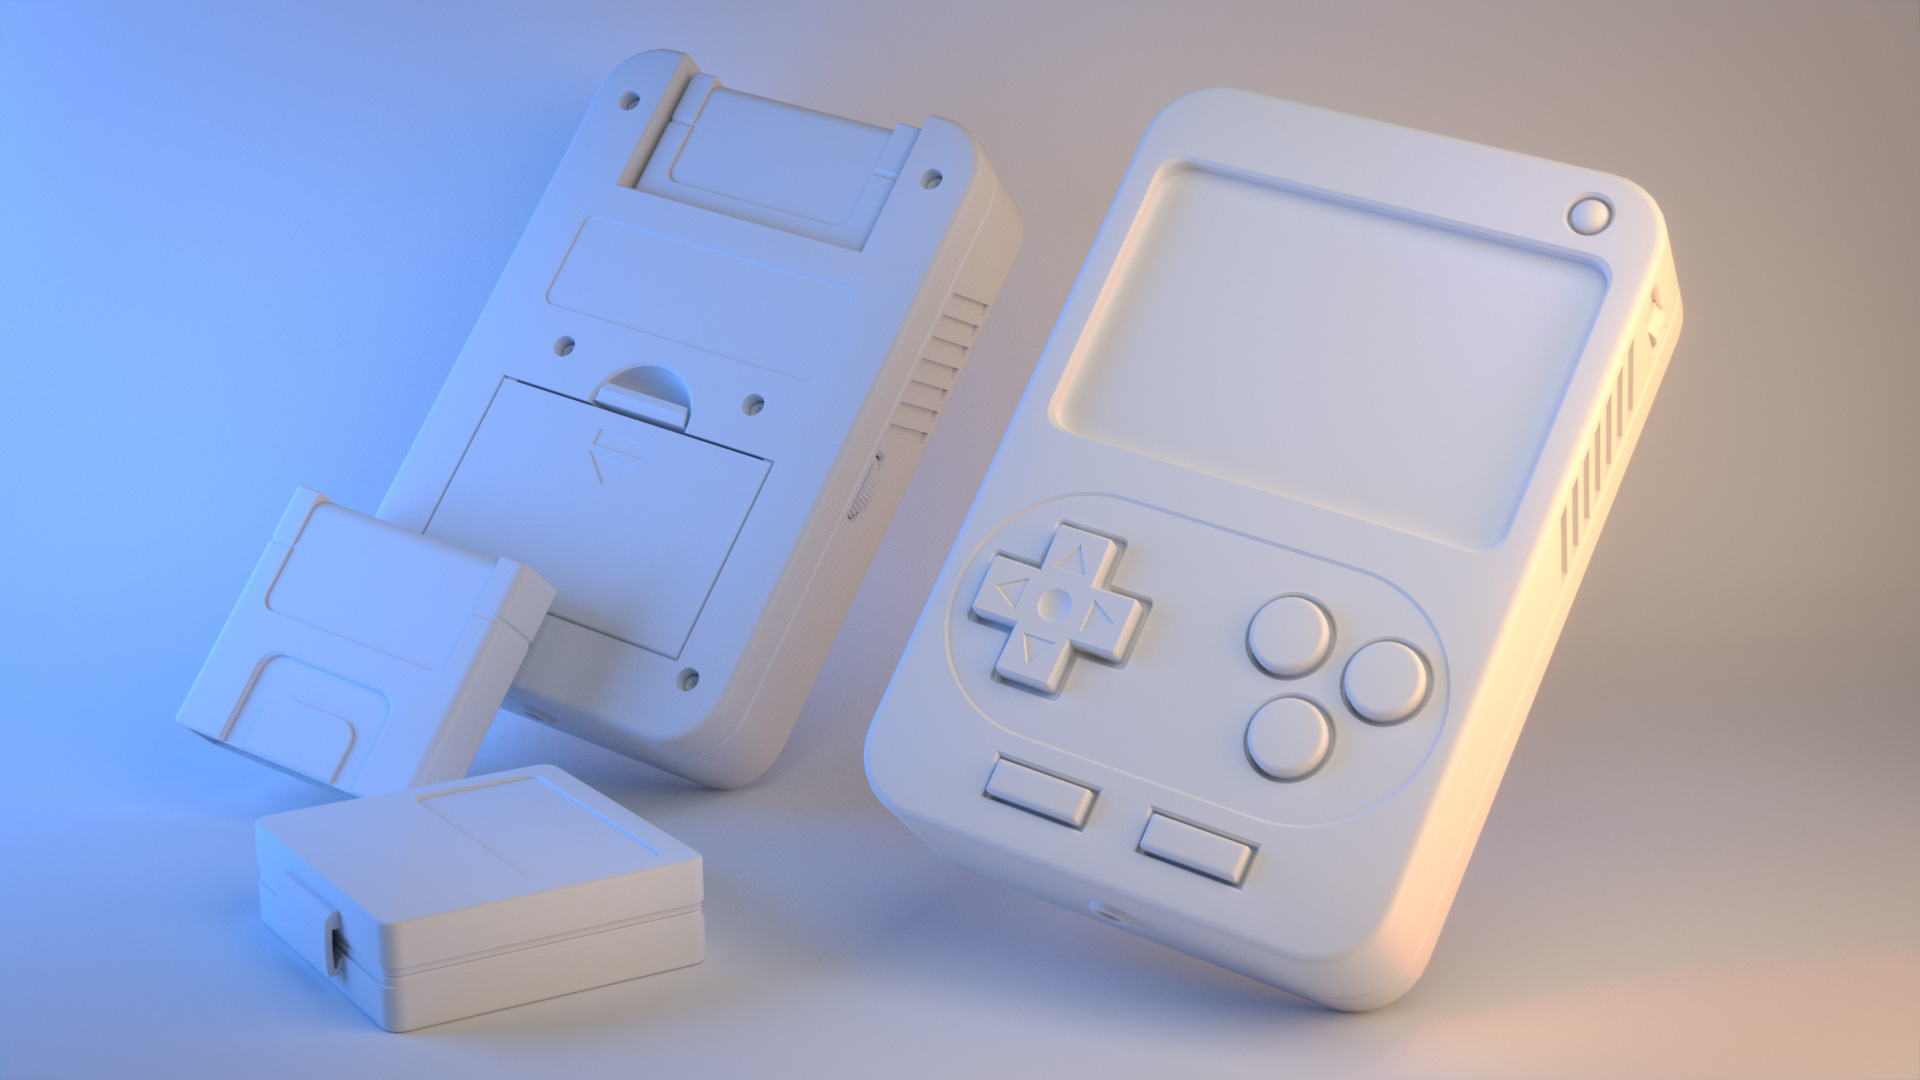
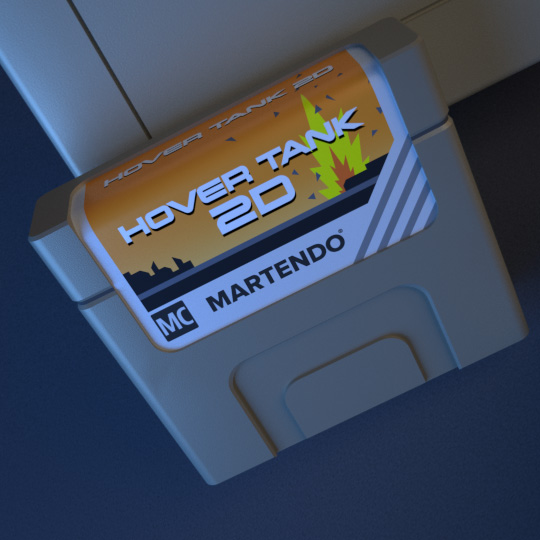
After that, I worked on articulating the back, adding a spot for a support label and a battery compartment. I also punched holes in the back and added screw heads to hold the whole thing together. Finally, I added a game cartridge to the slot in the back and put a stack of them off to the side. This made up the bulk of the work on the second render:
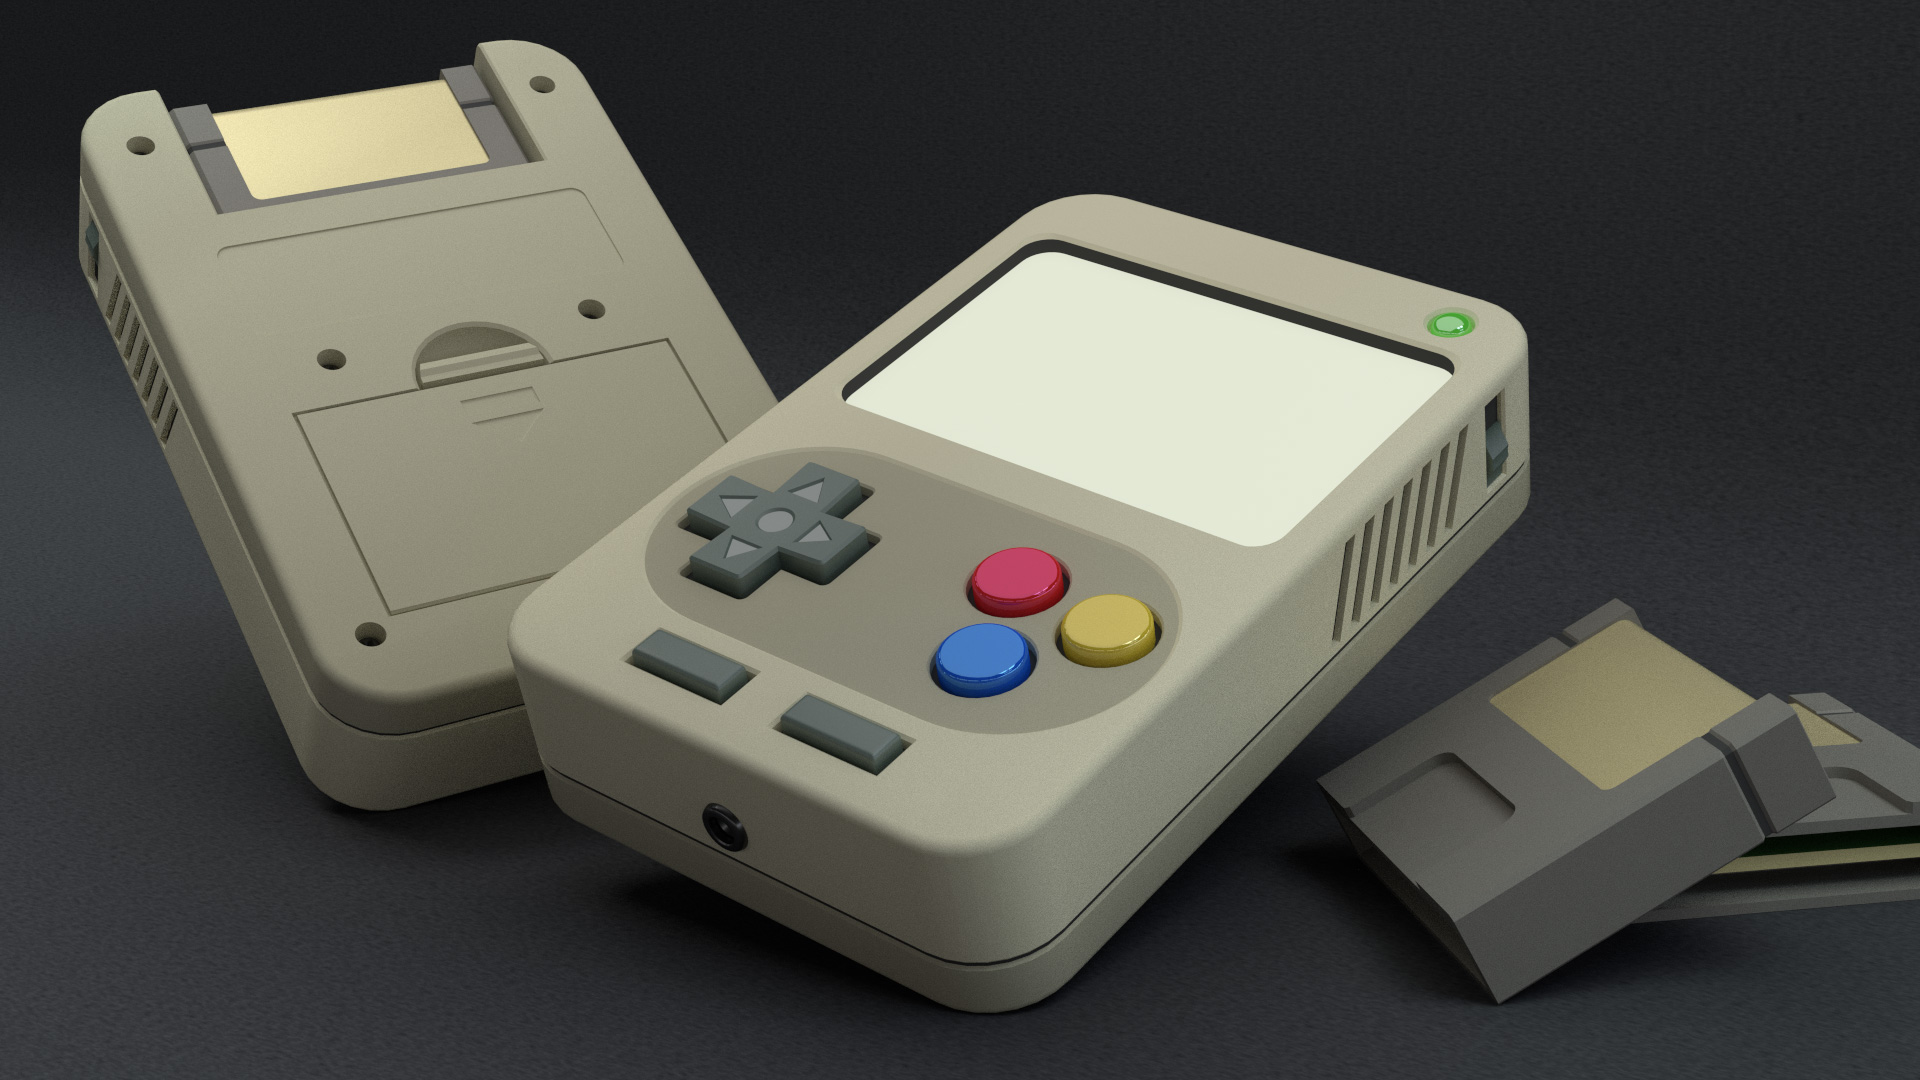
It was a bit hard to see as I was modeling (or maybe I just didn’t want to see it), but the game cartridges looked too simple to me in this render. They had the basic shape that I wanted, but compared to the level of detail in the system itself, they looked unfinished. I pressed on, adding in some textures for the screen, back label, and game labels. I also added some extra details to the cartridges to try to help them look like they belonged. You might recognize some of the artwork I used on the game labels, if you’re familiar with the games I’ve worked on in the past!
Unfortunately, the game cartridges still didn’t look too great, and the lighting was, overall, a bit flat. The materials, which were still the originals I’d picked out for the first rendering, were starting to look a little plain too.
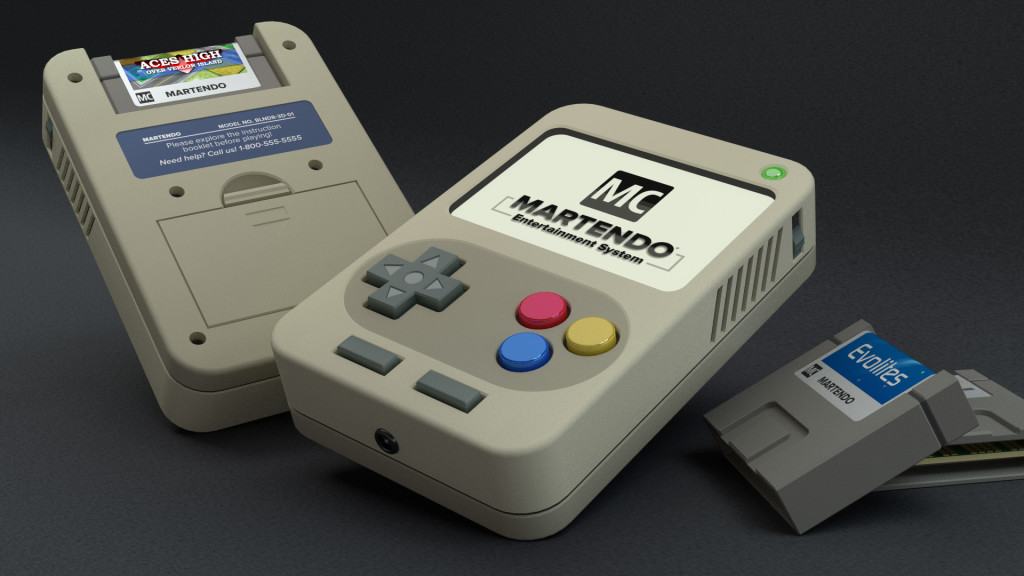
At this point, I was starting to feel a little lazy about working much more on this, and my other work (the stuff I make money from!) began to spike, and so I announced that this render was complete and posted it to Facebook, Twitter, and my website.
Later I attempted to liven things up with some extra colored lighting, with a render I’d not released publicly. It helped some, but didn’t go far enough to fix things overall:
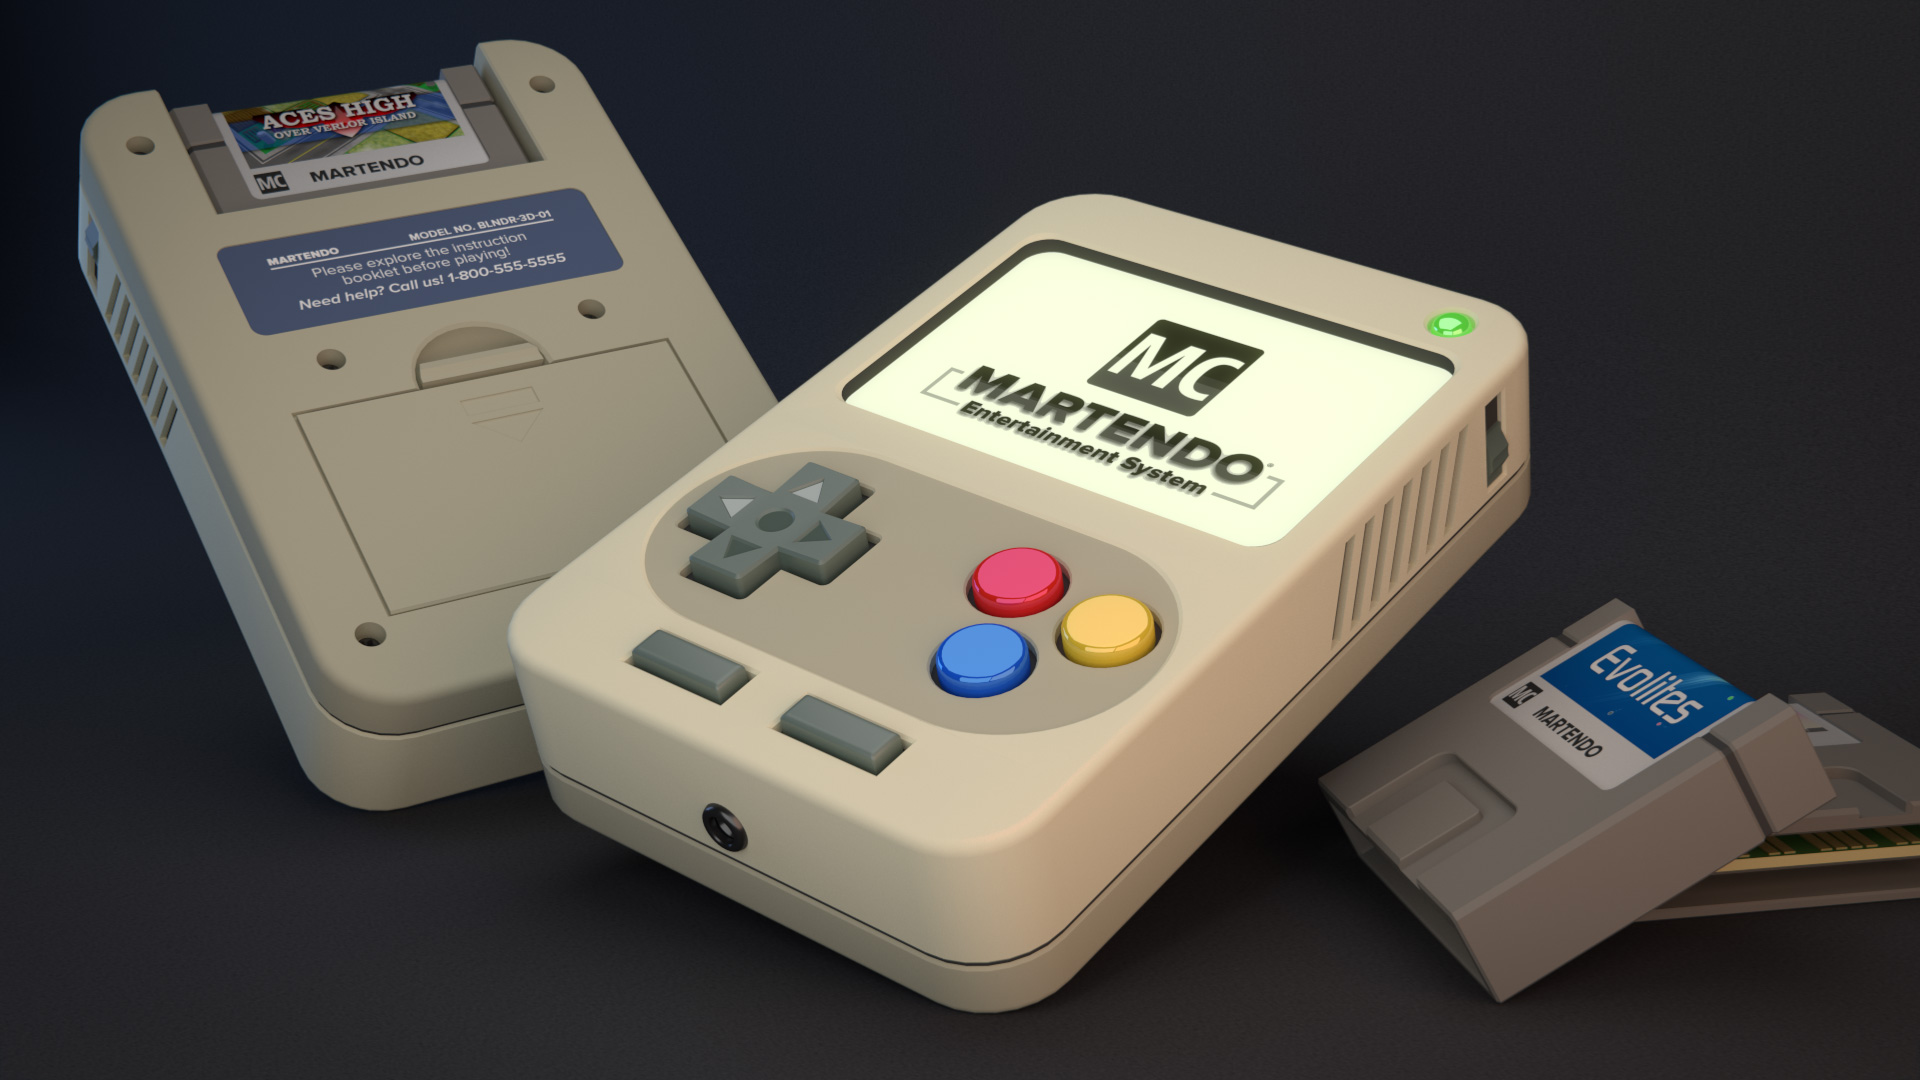
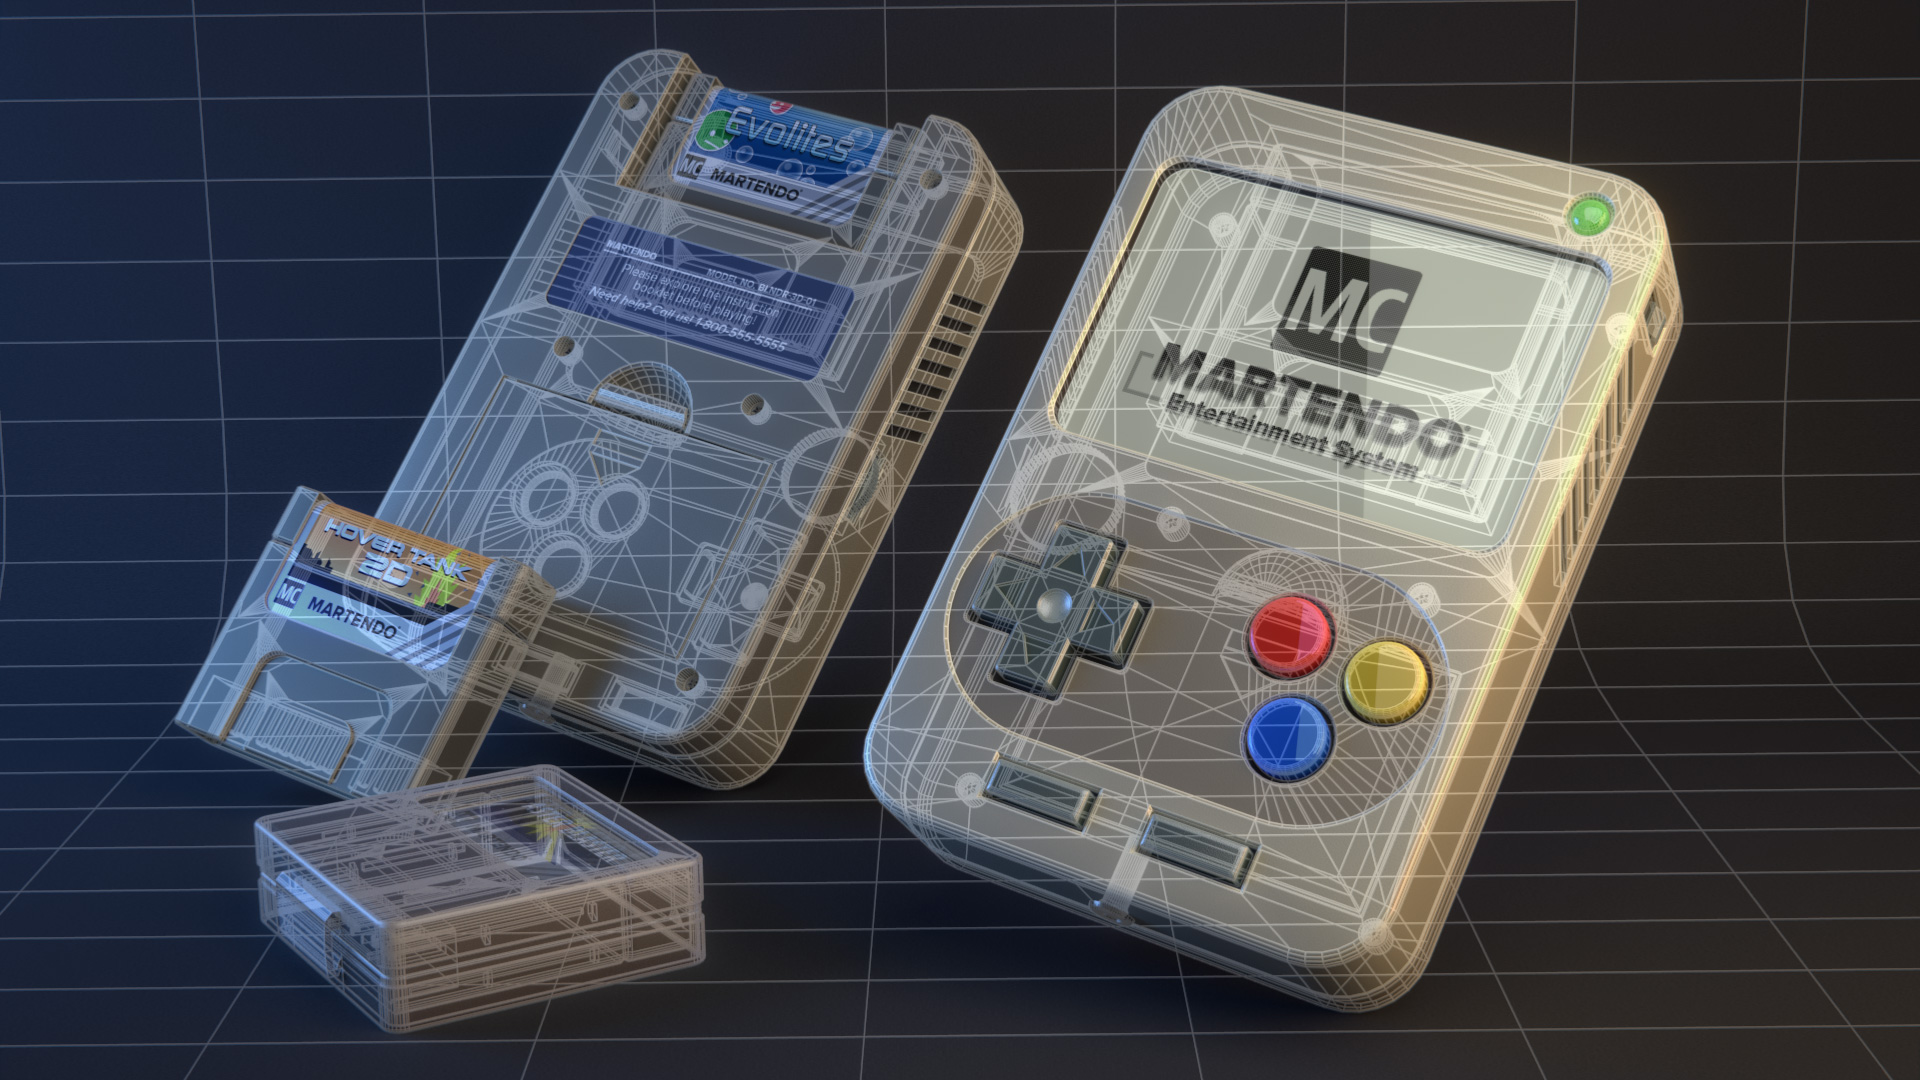
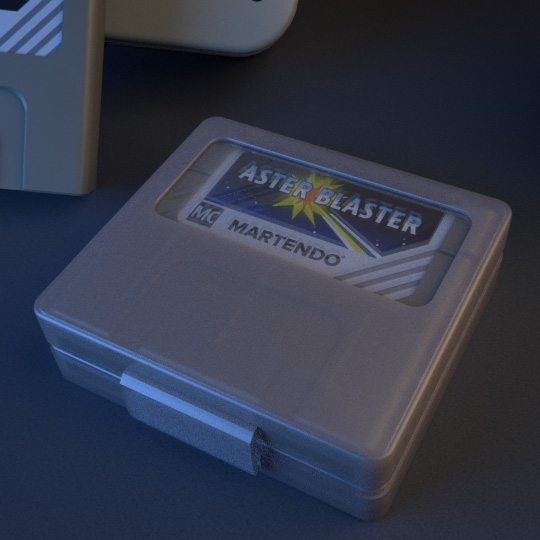
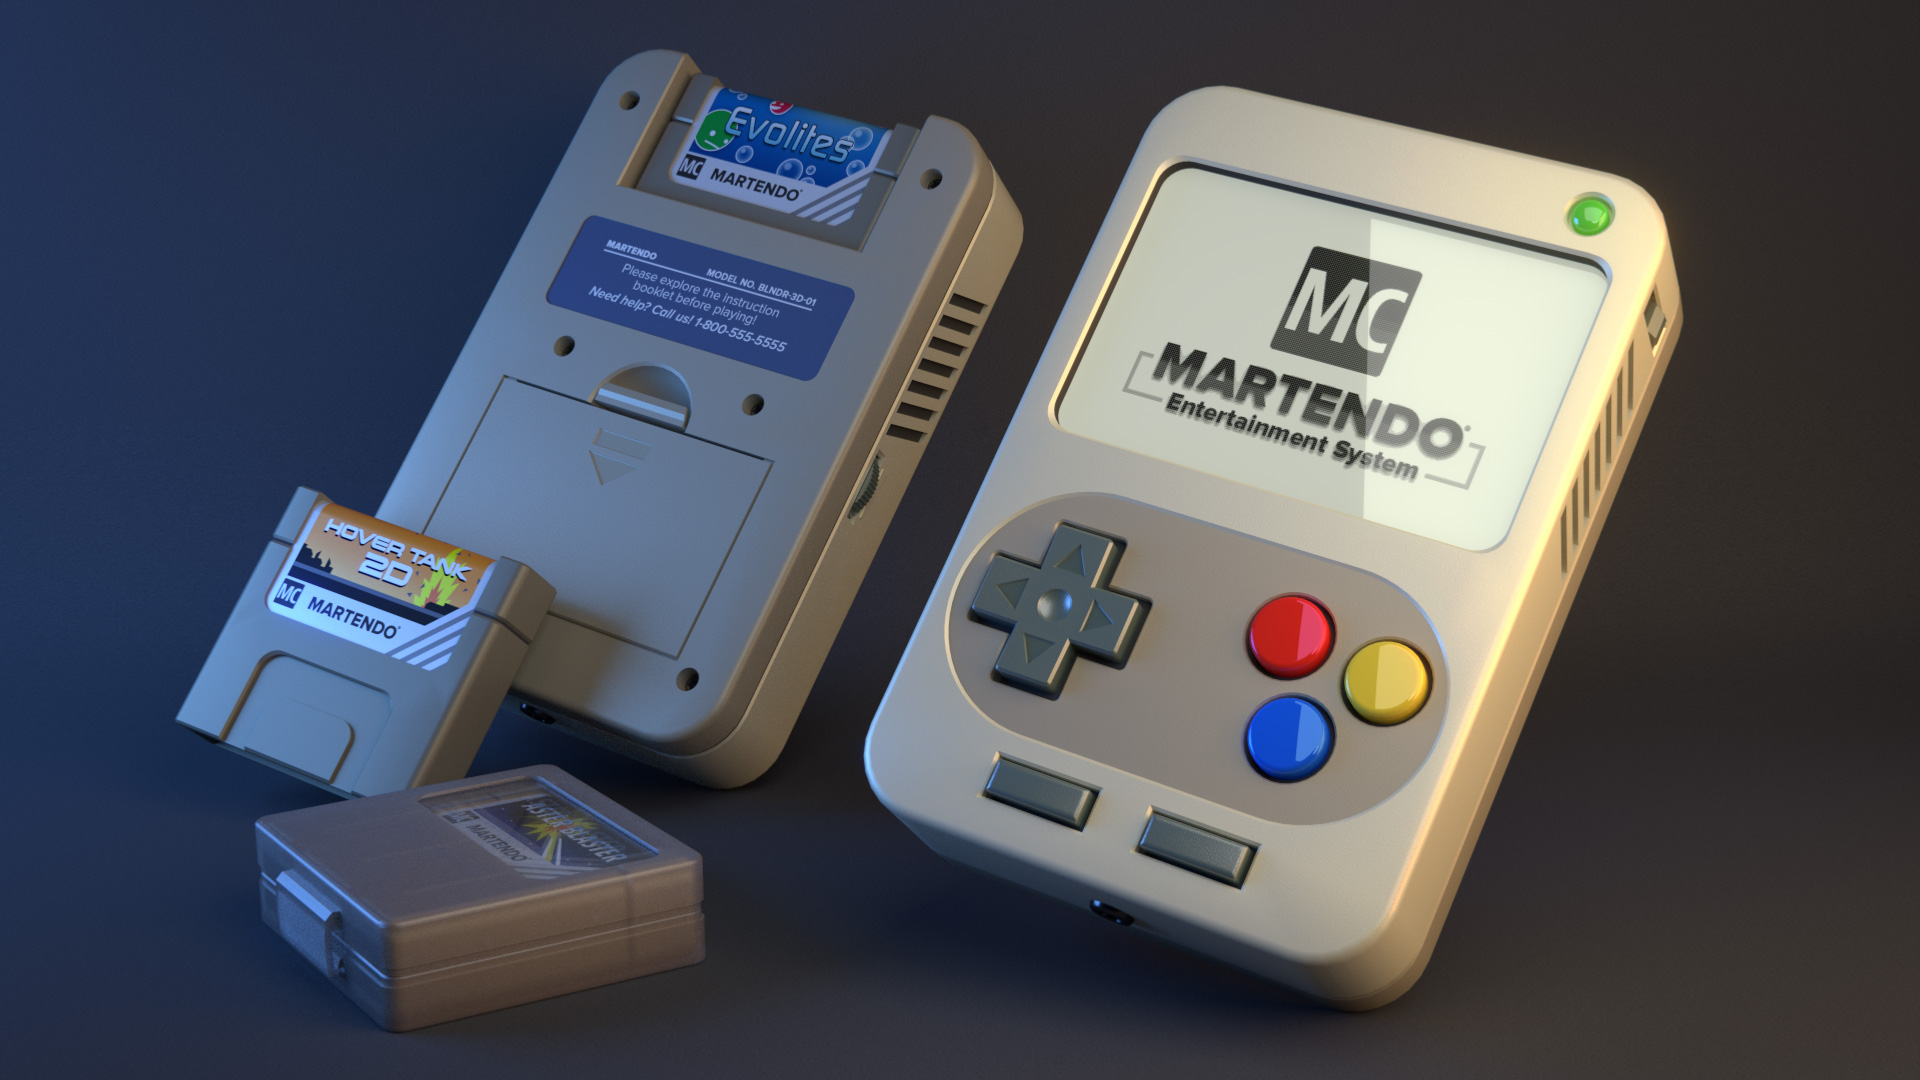
In the meantime a friend of mine on Facebook, who has a lot of experience working in the VFX industry, spotted my last post and decided to give me some critique. He posted a long list of notes, and after spending some time reading over them, I decided I should give this render a little more love and try to push it to be better. So I went into every material in the scene and re-worked them to be more realistic, adding more hardness, extra fresnel gloss to the edges, and generally being more thoughtful about the actual make of each material. I rebuilt the game cartridges from scratch, so have more detail and feel better proportioned. I re-positioned the objects in the scene to be more aesthetically pleasing, and added a game case to the scene. Finally, I recreated the game labels from scratch, in an attempt to make them look just a little more retro, and adjusted the lighting one last time. Here’s how the final render looked:
I think the improvement is pretty great, and definitely worth the extra work.
One thing I really miss from doing projects in college – the critiques which followed. It’s good to have friends who can give you good artistic advice/critique.
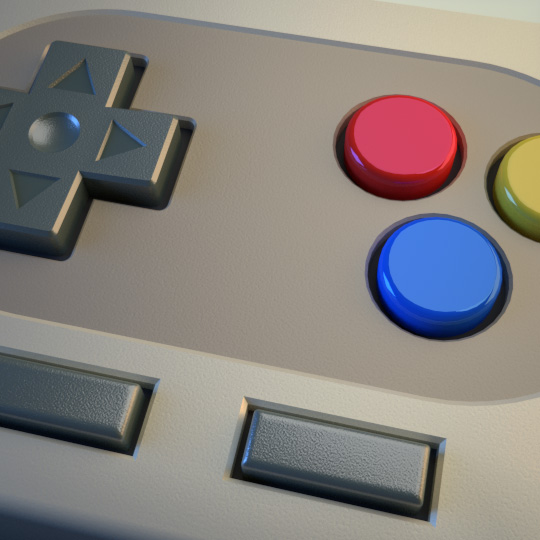
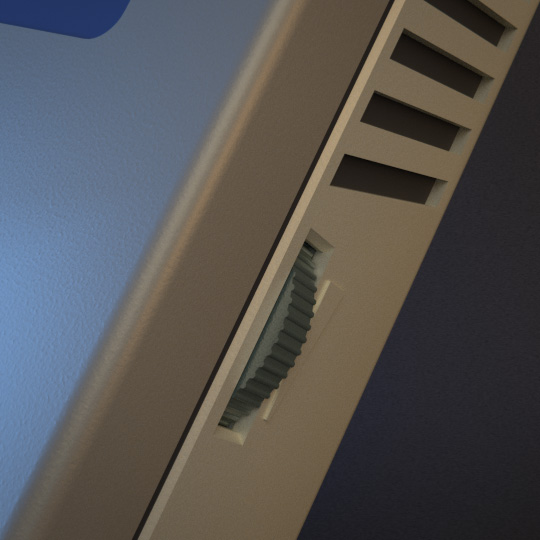
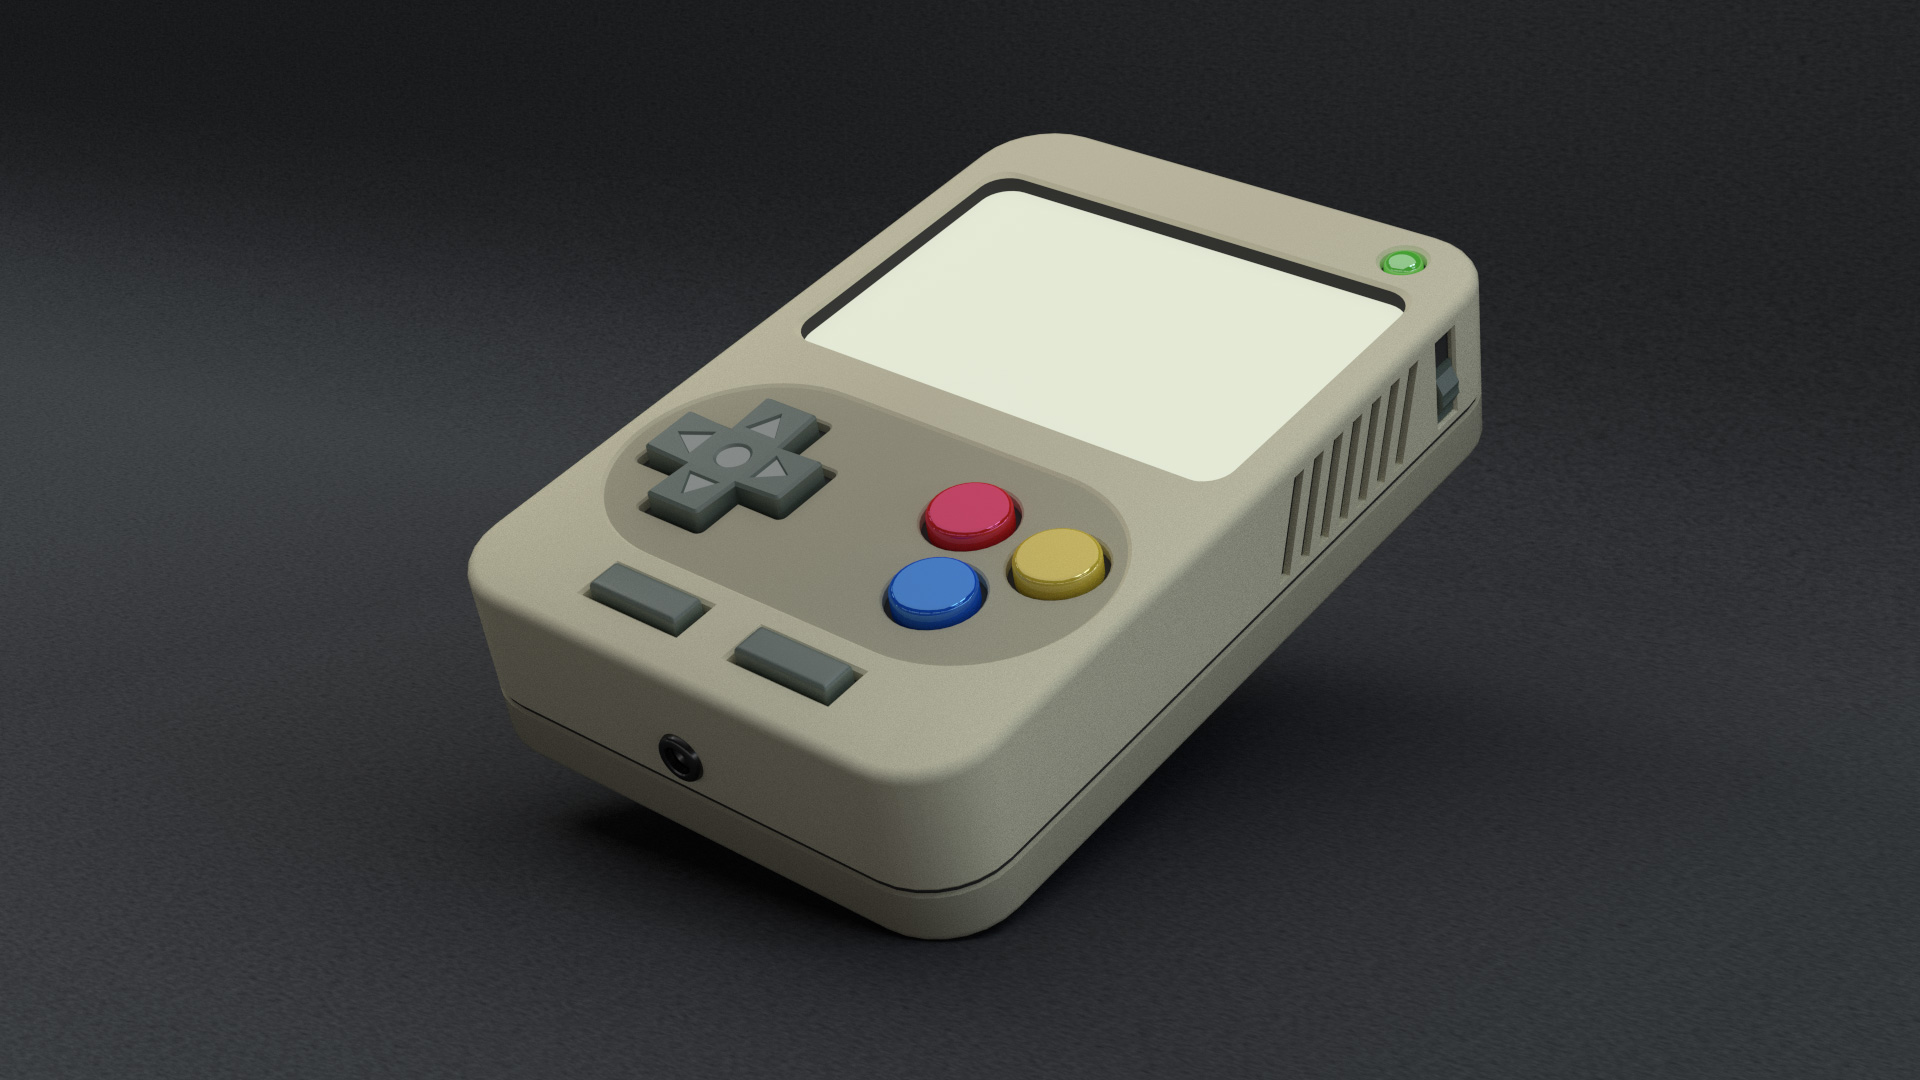
Here are a few other renders of the details, and to show the composition of the render a bit better: