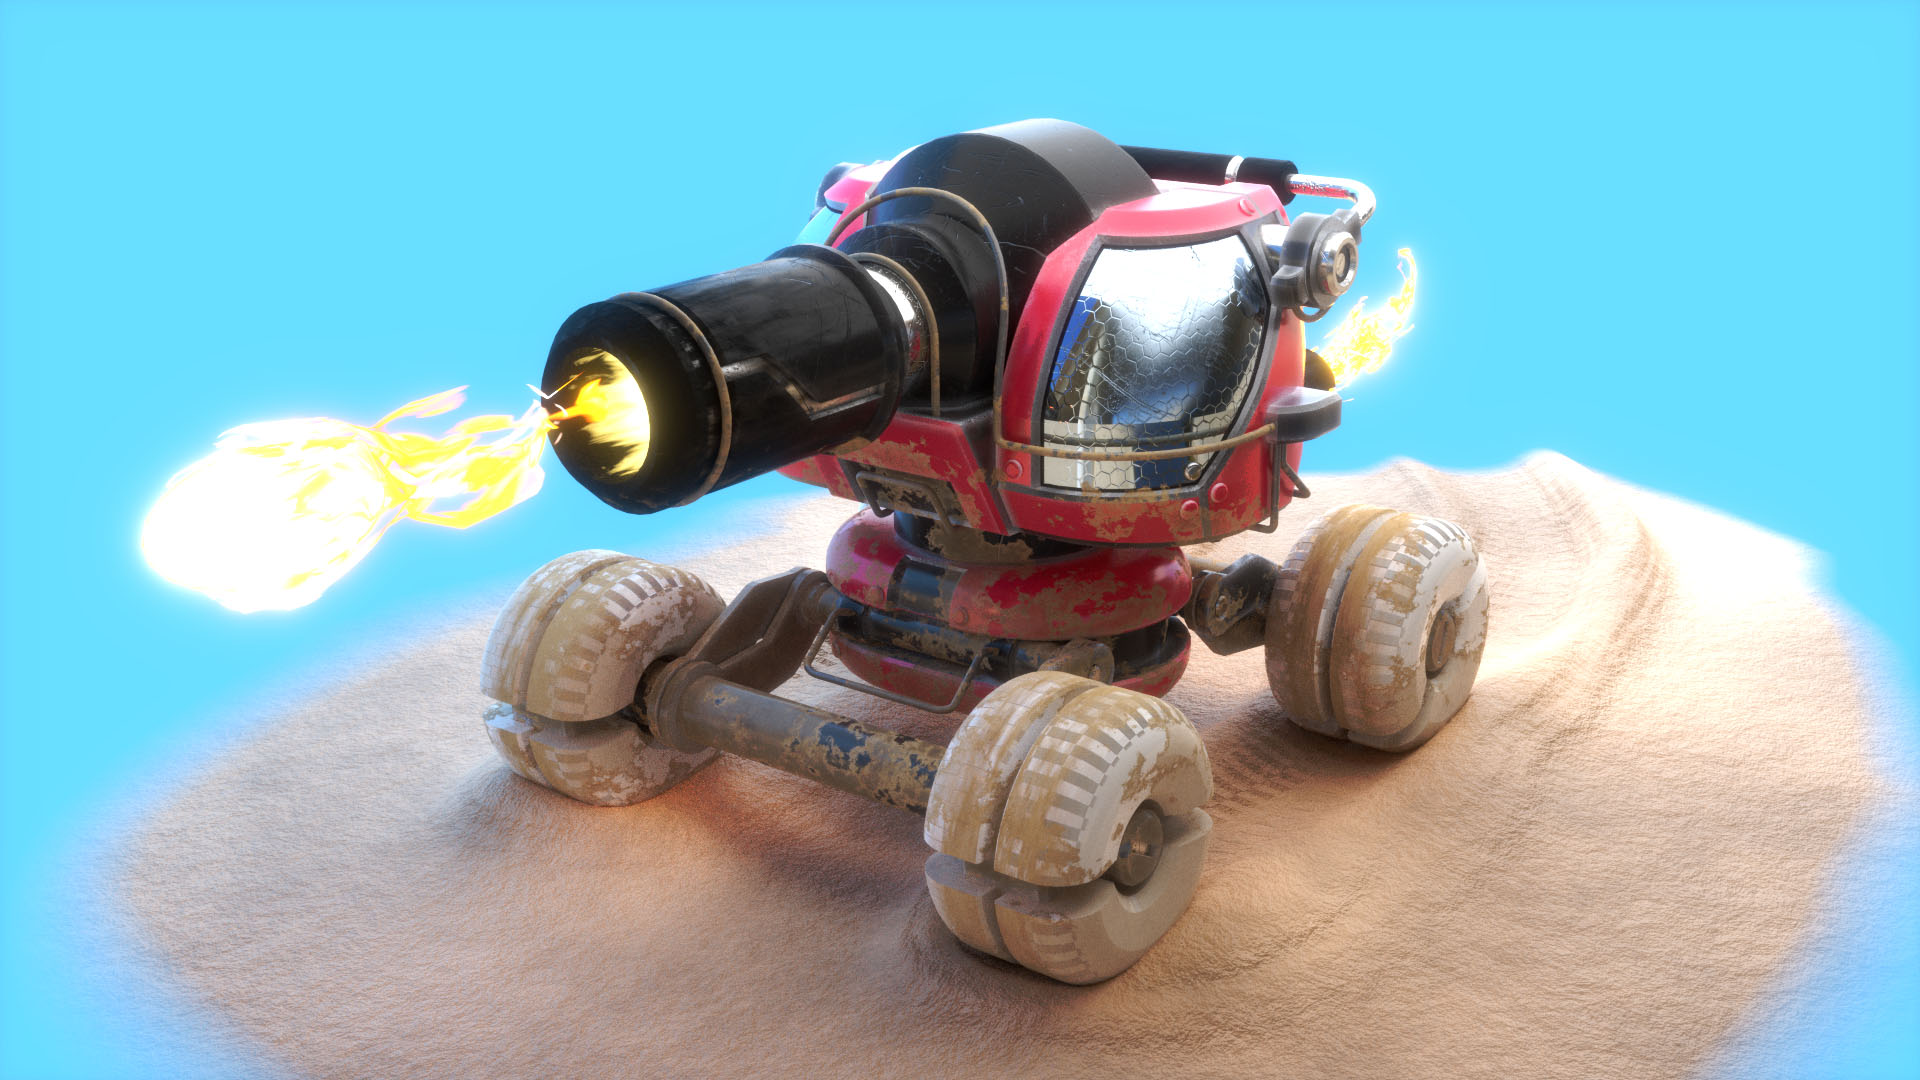
I've been continuing to dig through my old Blender projects lately, and like the Piranha Plant I did a month ago, this Blaster Master tank looked primed for a re-work.
So I spent some time yesterday adding new details, re-working materials, and fixing some things that looked very unfinished in the original work. This is the end result!
The scene uses a mix of images and procedural textures, and I had a great time roughing things up. You can see it from all angles over at Sketchfab.
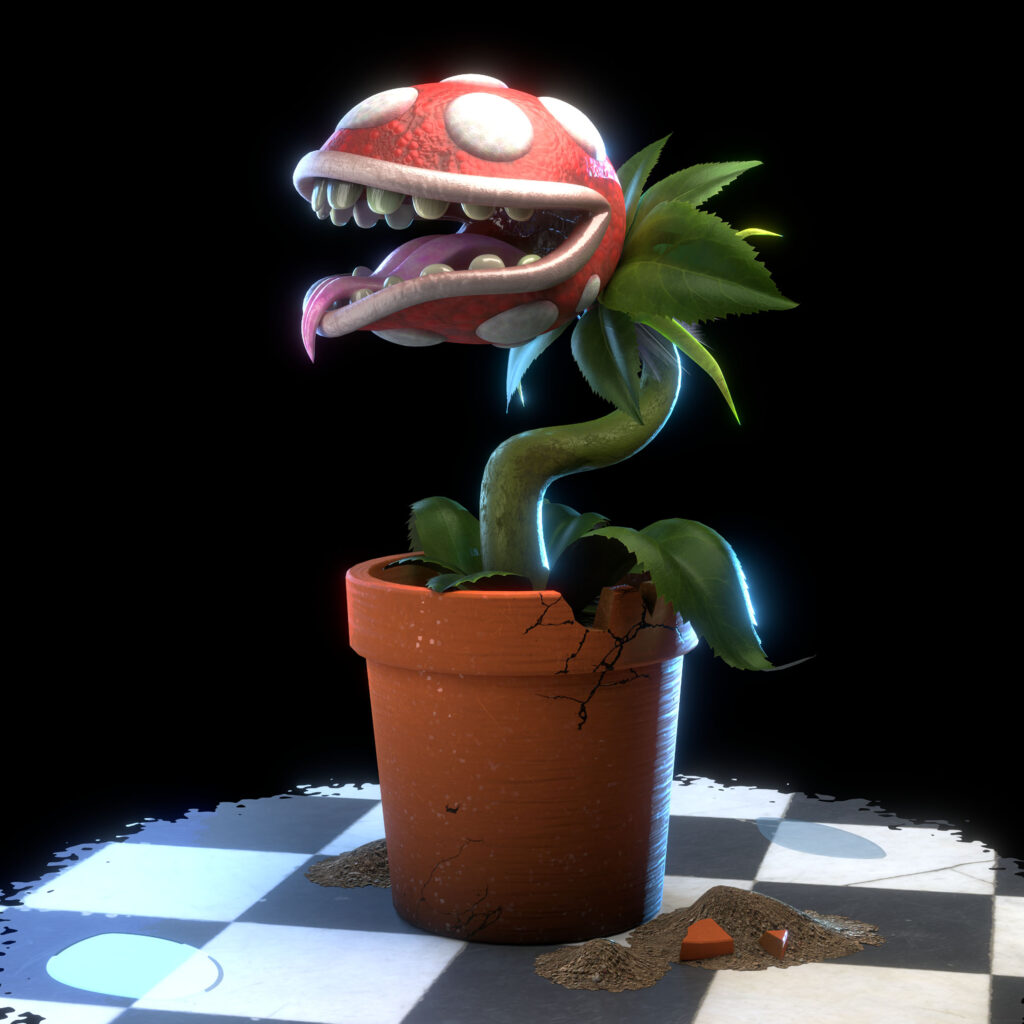
6 years ago, I posted a render of a piranha plant I modeled and textured to practice Blender. It isn't a bad render, but the procedural materials look a little rough and I wanted to revisit it and see how I could improve it.
This is the result - an updated render with a blend of procedural and texture-based materials and employing all the stuff I've learned since creating the original.
There's probably a little more that I could do to clean it up, but overall, I'm pretty happy with how this one turned out. I might have to revisit some of my other older projects soon to see what I can do!
If you're interested in inspecting this one from other angles, you can see it on Sketchfab.
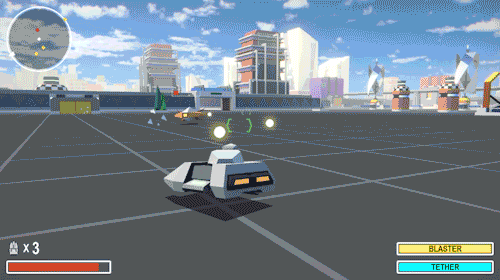
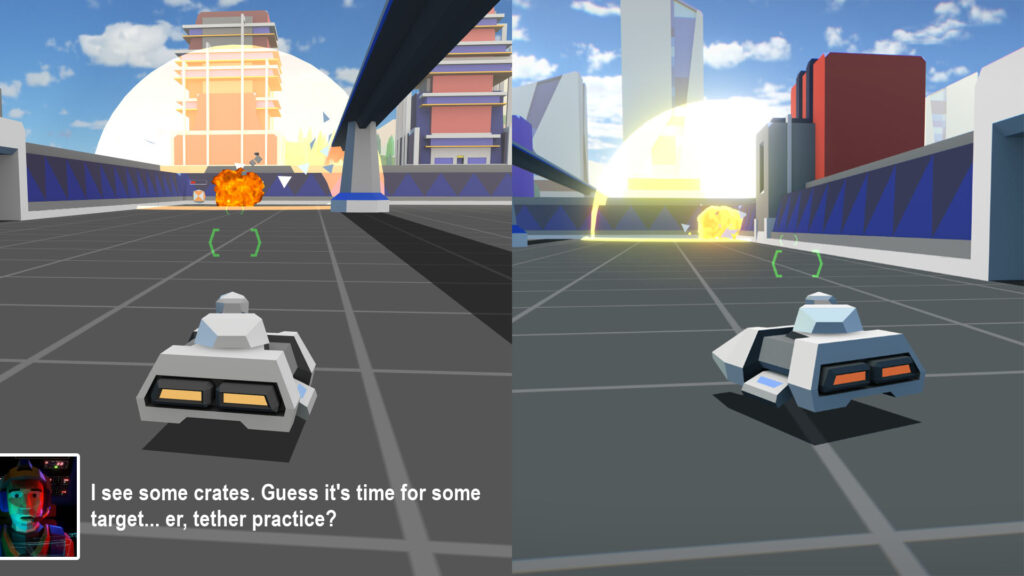
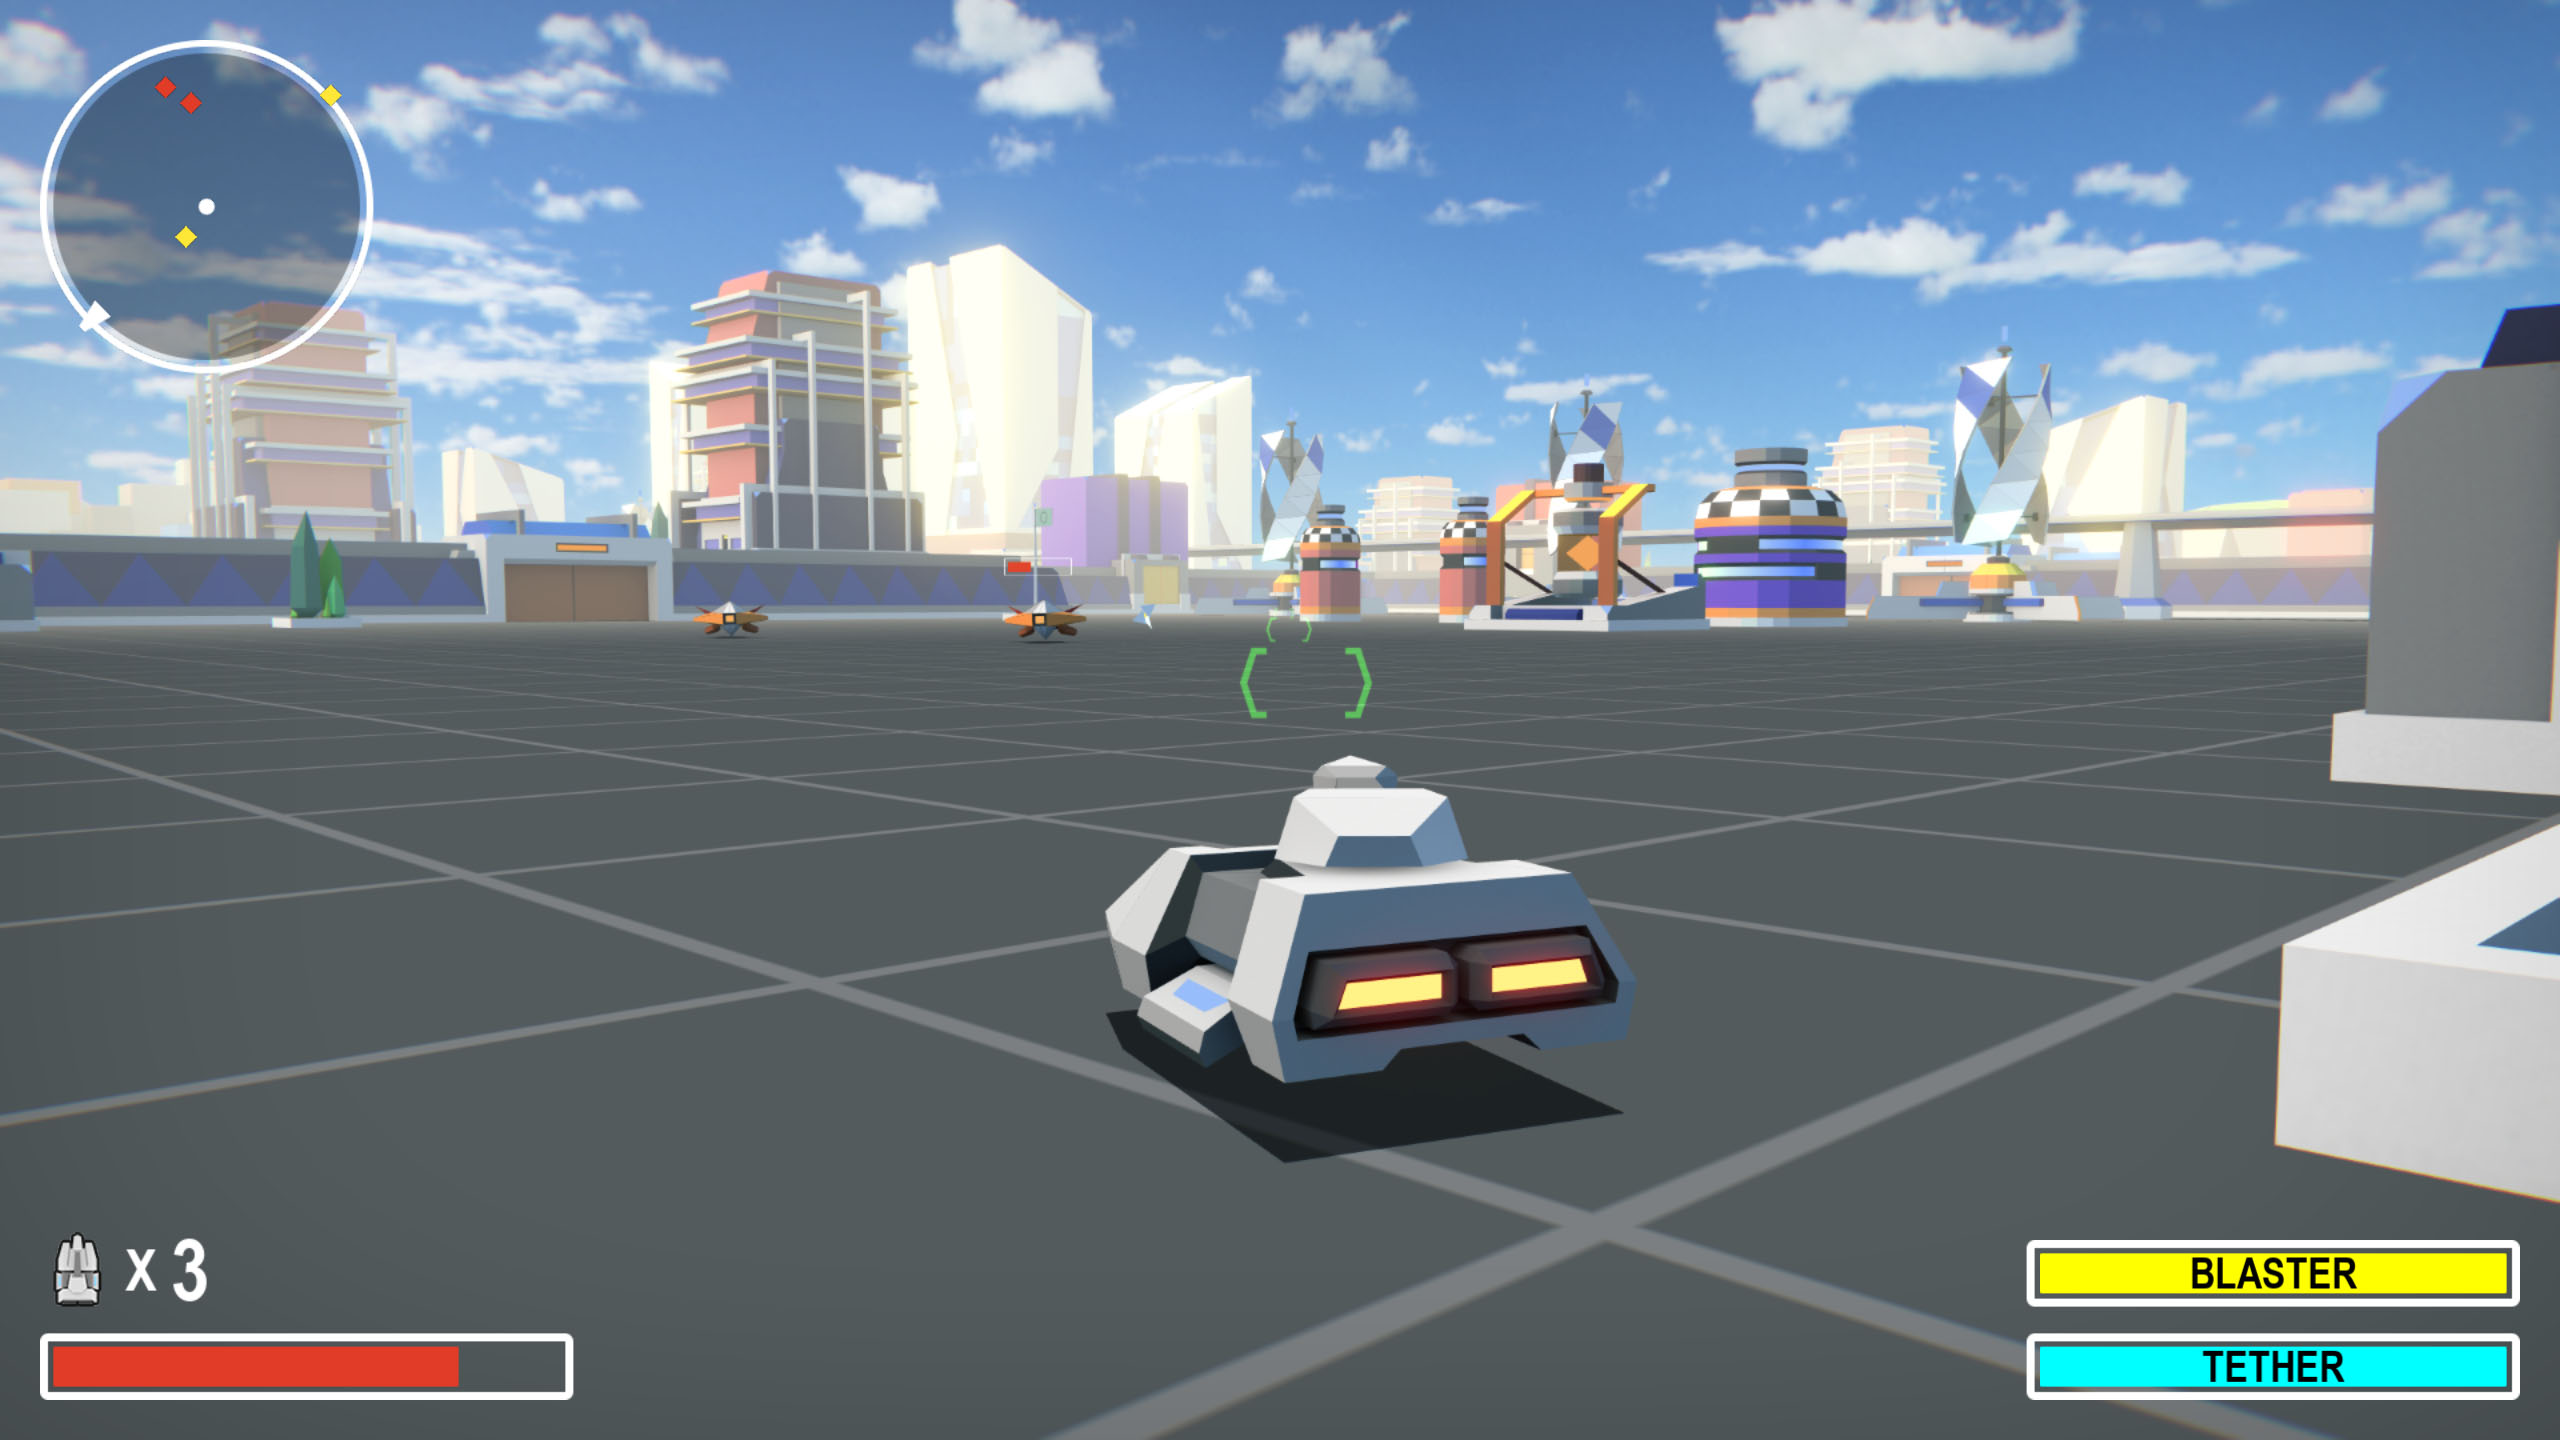
I recently finished working on my HT3DR demo/prototype, and released it on the world two days ago. So far, people seem to like it, and that makes me happy.
I've done a few write-ups here and there to get the word out and promote it. One, in particular, dove into a few details I haven't talked about elsewhere, so I thought I'd share it here in case anyone might find it interesting:
Greetings fellow GameMaker users!
I recently finished putting the last touches on a game demo/prototype for a game called HT3DR, which is a remake/re-imagining of my old (and I like to consider, classic) GameMaker game, Hover Tank 3D. You can play the new game here: https://martincrownover.itch.io/ht3dr
I released HT3D way back in 2006! It is a complete game that took me over a year to put together, and though it looks a bit dated by modern standards, I am proud of it - especially considering the awful tools I had to use, and my complete lack of knowledge for building a thing like that.
I took a long break from GameMaker before working on this game, and I took it up as a challenge to see how much better I could do this time around, how much closer to my vision I could make it, and to get re-acquainted with GameMaker and its new features.
It took me 4-5 months to make my HT3DR prototype, and I ended up learning a lot - and so as I share my work with you, I thought I might share some of the things I learned as well.
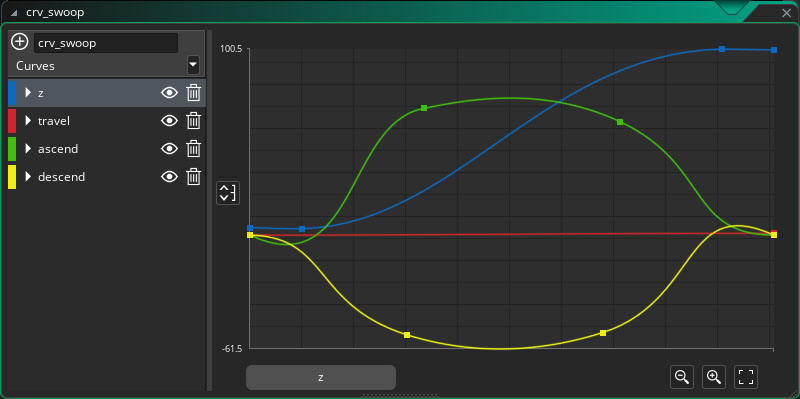
Animation curves are incredibly useful
Before this project, I'd never used the new-ish animation curves feature in GameMaker. I had built a set of scripts many projects ago that emulated the common easing functions you find in other languages, like jQuery, through code, and I dropped them into all my projects. They were cumbersome to use, but they got the job done.
Animation curves take a lot of the guesswork out of things. It's easy to make a single animation curve asset for a particular action, like the purple "Swooper" ships in HT3DR, which contains all the different curves for their takeoff, landing, and A-to-B movements.
Batching helps
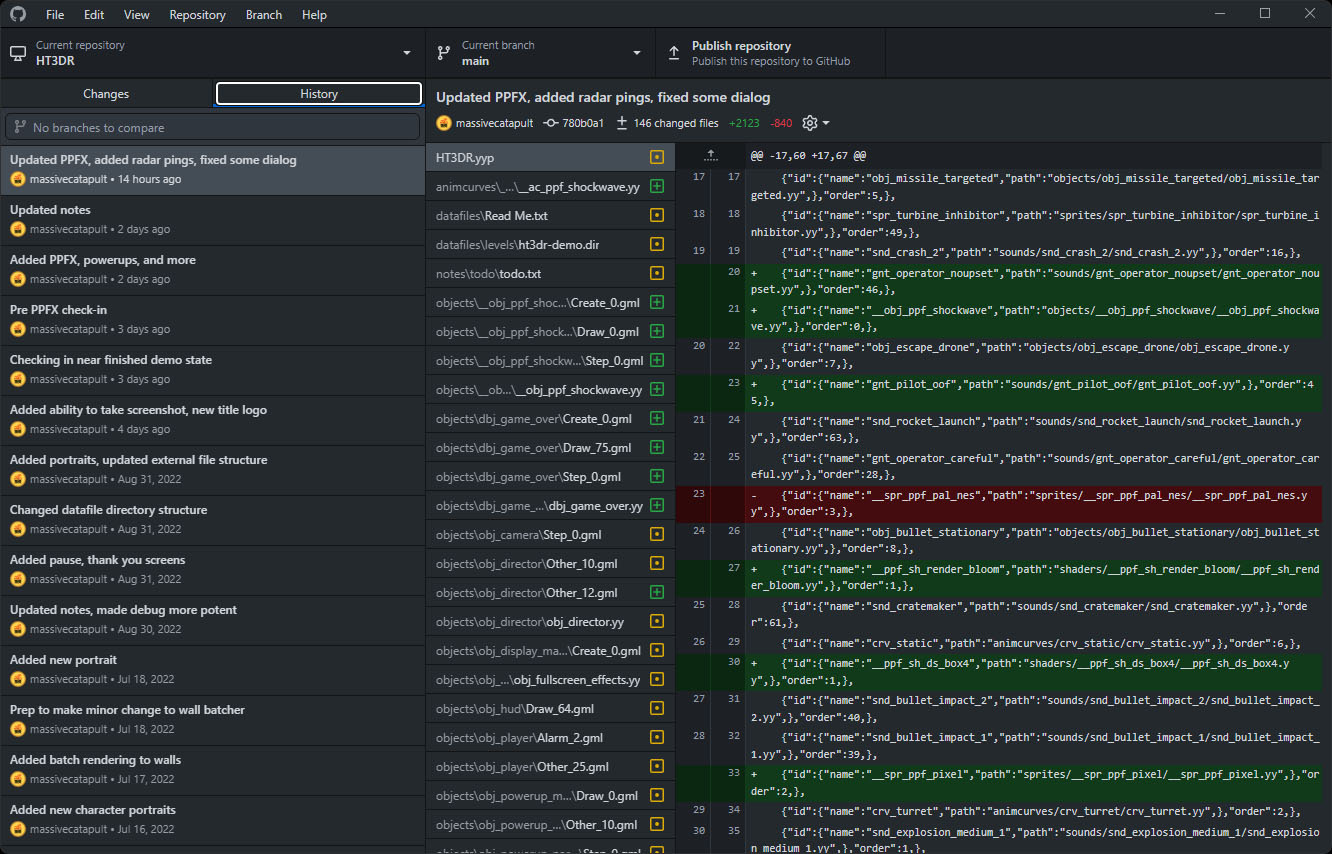
When I first started working on HT3DR, I was concerned about how well the game might run, even on my beefy computer - so I spent a lot of time making sure that as I added things to the game and tested them, the framerate wasn't dipping much.
At some point I was satisfied with performance and started just building out my demo level in earnest. I removed the FPs counter from the game as I tested the HUD, and never noticed a slowdown as I worked.
Once I had the near-final build of the level built, I started becoming curious about how things were running behind the scenes, and so I started testing performance again, and I was a little shocked to see that merely having a level full of walls (without enemies) had slowed the "real" fps from ~3,000 to ~300.
300 real fps isn't really that bad, but I wanted to cut down on waste. All my wall objects (1m, 2m, 4m, and convex/concave corners) all share the same texture, and they made up the majority of the level parts, so I wrote an object that batches them all into a single draw call, as opposed to over a hundred. The result was an increase of about 50-100 real fps, which seemed like a good gain.
If I work further on this project, I might eventually consolidate all the static buildings into one draw call - maybe even the same one as the walls - and just merge them all into using one giant texture. Currently, the largest textures the game uses are 1024x1024.
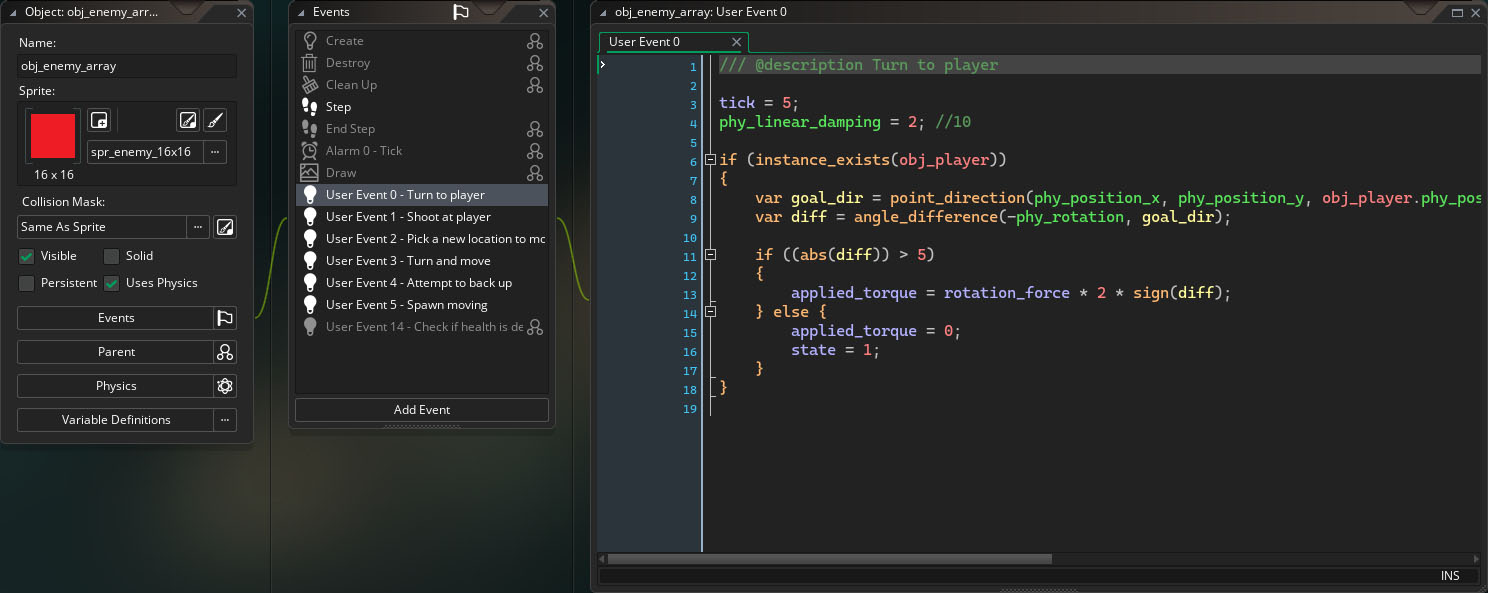
Use state machines
All of the more complicated objects in HT3DR use a form of state machine to help sort out the code. For enemies, each object has a "state" variable and a "tick" counter, and uses an alarm timed to the tick. Each time the alarm fires, it calls a custom user event whose number corresponds with the state, which is responsible for doing whatever it ought to do. It then resets itself with the tick value, which can change based on the state.
This simple setup lets me have enemy AI only evaluate a few times every second, and it keeps the code from getting super long and becoming hard to debug just based on size.
The biggest drawback to this approach is GameMaker's hard limit of 16 custom user events, but I was able to keep my most complicated object (the end-level boss) under the limit pretty easily, so it worked out alright. Your mileage my vary, of course.
Parents and variable definitions keep things simple
I've been using GameMaker since around 2002, and I'm a little ashamed to admit that I haven't made much use of parent objects up to this point. I had a bad experience getting them to work right way back in GameMaker 5, and I always found ways around using them. Not this time!
Parent objects in HT3DR were incredibly useful. I don't even know how I could have made this without them. Giving all my walls a parent, all my enemies a parent, all the projectiles a parent, etc. saved me so much time, and made coding collisions, sound effects, and more a breeze.
Variable definitions, which are a bit newer to GameMaker, were equally helpful. I set all my default settings for an object type as variable definitions, and then changed them only when needed in the child objects. It made dropping a new wall object into the game, for example, almost as simple as just exporting it from Blender. Since I don't have to worry about setting up collisions, bullet reactions, etc. - it's all just there, ready for me to use from the parent object.
Don't be like me. Use object parents. And use variable definitions.
Chip away at your project
As I get older, I seem to have less and less time for my hobbies - game-making included. And so some days, I wanted to add a big new thing to HT3DR, but I just didn't have the time. I learned to accept that, and just chip away at small stuff instead, and it made this project much easier to make progress on.
Try to do something every day or so. Make it a habit to keep working and tinkering, small or large. Whether you just add a new global variable, or you try some crazy idea and it ends up being something completely useless at the end of the day, at least you learned something. And tomorrow will be better because of that.
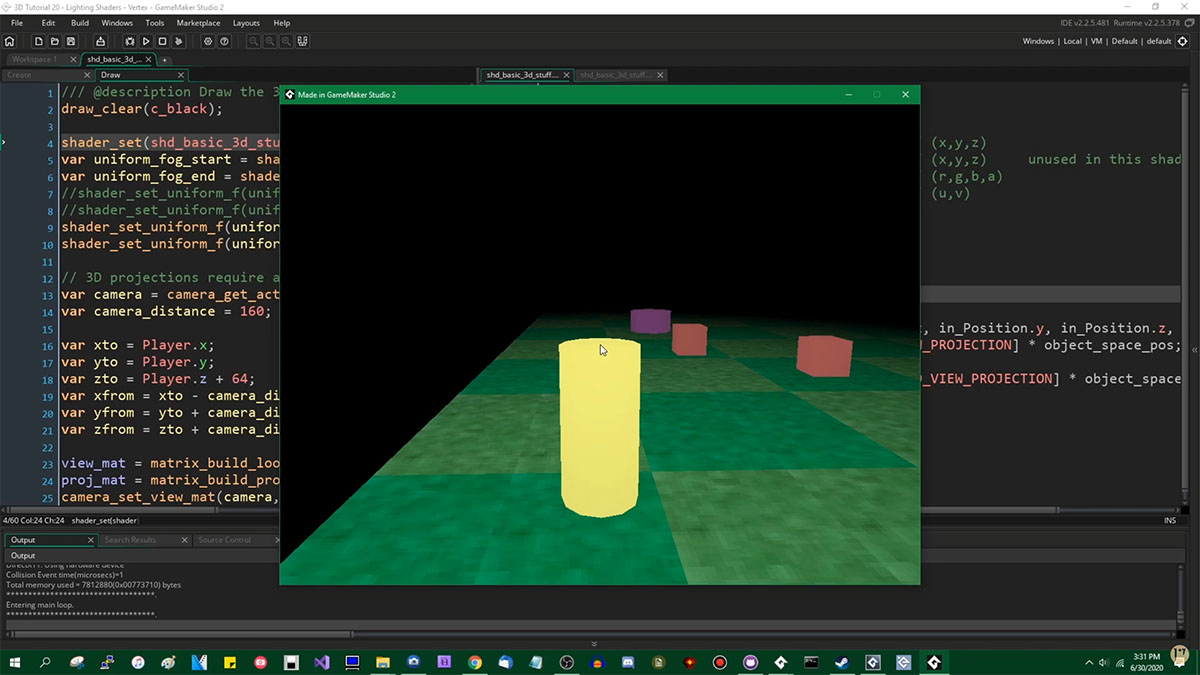
Writing your own shaders is challenging, but rewarding
I've been using the internet since the 90's and I don't think I'm bad at searching for things - but as I learned to make my own shaders in GameMaker, I found it incredibly difficult to find good resources explaining the what and why of it all. I know resources like Shader Toy exist, but without someone stepping you through what each bit of code is actually doing, even open source shaders can be hard to glean value from.
It was incredibly useful to hear him explain why he did certain things, what each step did, etc. In fact, I credit DragoniteSpam for unknowingly motivating me to get this project done. I would have never started it if I had had to contend with GameMaker's awful built-in 3D lights.
Don't re-invent the wheel
With that said, also don't re-invent the wheel. If others have done the work before you, utilize it. There's no shame in getting help.
I spent a few days working on my own bloom shader before admitting that it looked terrible. I poked around a bit for other solutions that might work, and came across the Post-Processing FX addon by FoxyOfJungle/Kazan Games.
I bought it, added it to the project, and a half hour later my bloom effect was just what I wanted - along with a couple of other effects that I wouldn't have added otherwise, like vignette and color/exposure adjustments.
This is an incredible tool, and I can't recommend it enough. I'm glad I didn't spend more time trying to make something inferior.
Backups are important, but source control is king
Using Github desktop is something that I've been doing for many projects now, but it really takes the pressure off of making big changes to a project.
In the old days, I would have saved a new version of the project before making big changes, and I would have constantly weighed my want to do so against not wanting to store hundreds of copies of my files. With Github, I just committed my project, made the big changes, tested, and committed again if everything went fine. Easy.
This made a couple of operations, like loading my project up in VS Code and doing a find/replace across the entire project, a lot less stressful. 😅
Find something you love and just make it
Many people are already doing this, but it doesn't hurt to restate it: if you have an idea, just try to build it.
In game development, my best projects are always the ones that I care about the most, and the ones that I spend time thinking about when I'm not actively working on them, and they only get to that point when I actually sit down and just start working on them.
Back in 1993, after I first played Starfox and saw the possibilities for even early 3D games, I fell in love with this stuff. I am an artist, and was learning how to draw in perspective around that time, and I drew so many basic polygonal images influenced by that game. One of those drawings was a tank, and it served as the inspiration for all of this - a thing that's been bouncing around my brain for almost 30 years.
I know an empty project is a daunting proposition, but it's so rewarding and fun to see your ideas come to life - and it has to start somewhere. Make a thing!
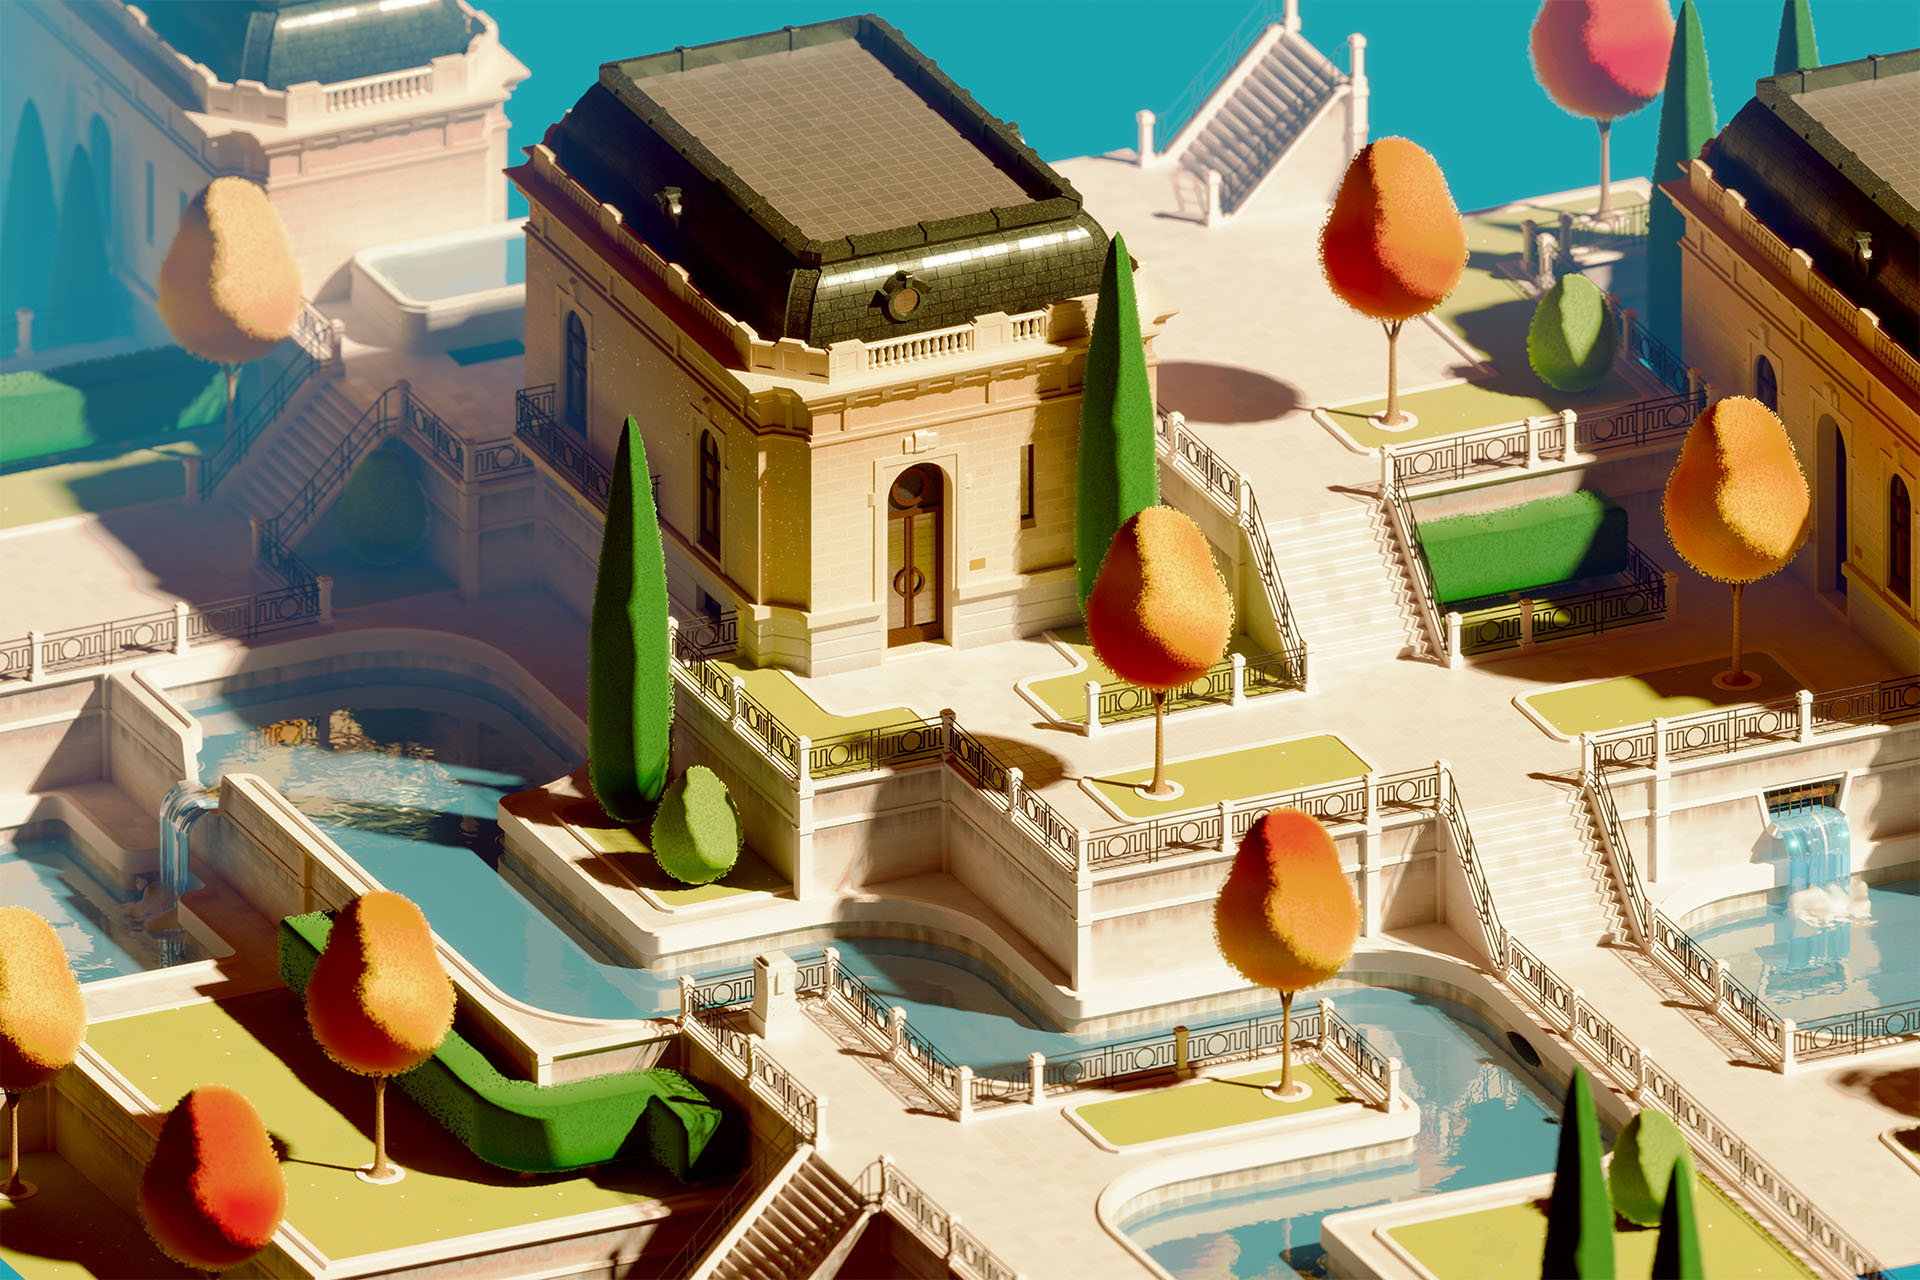
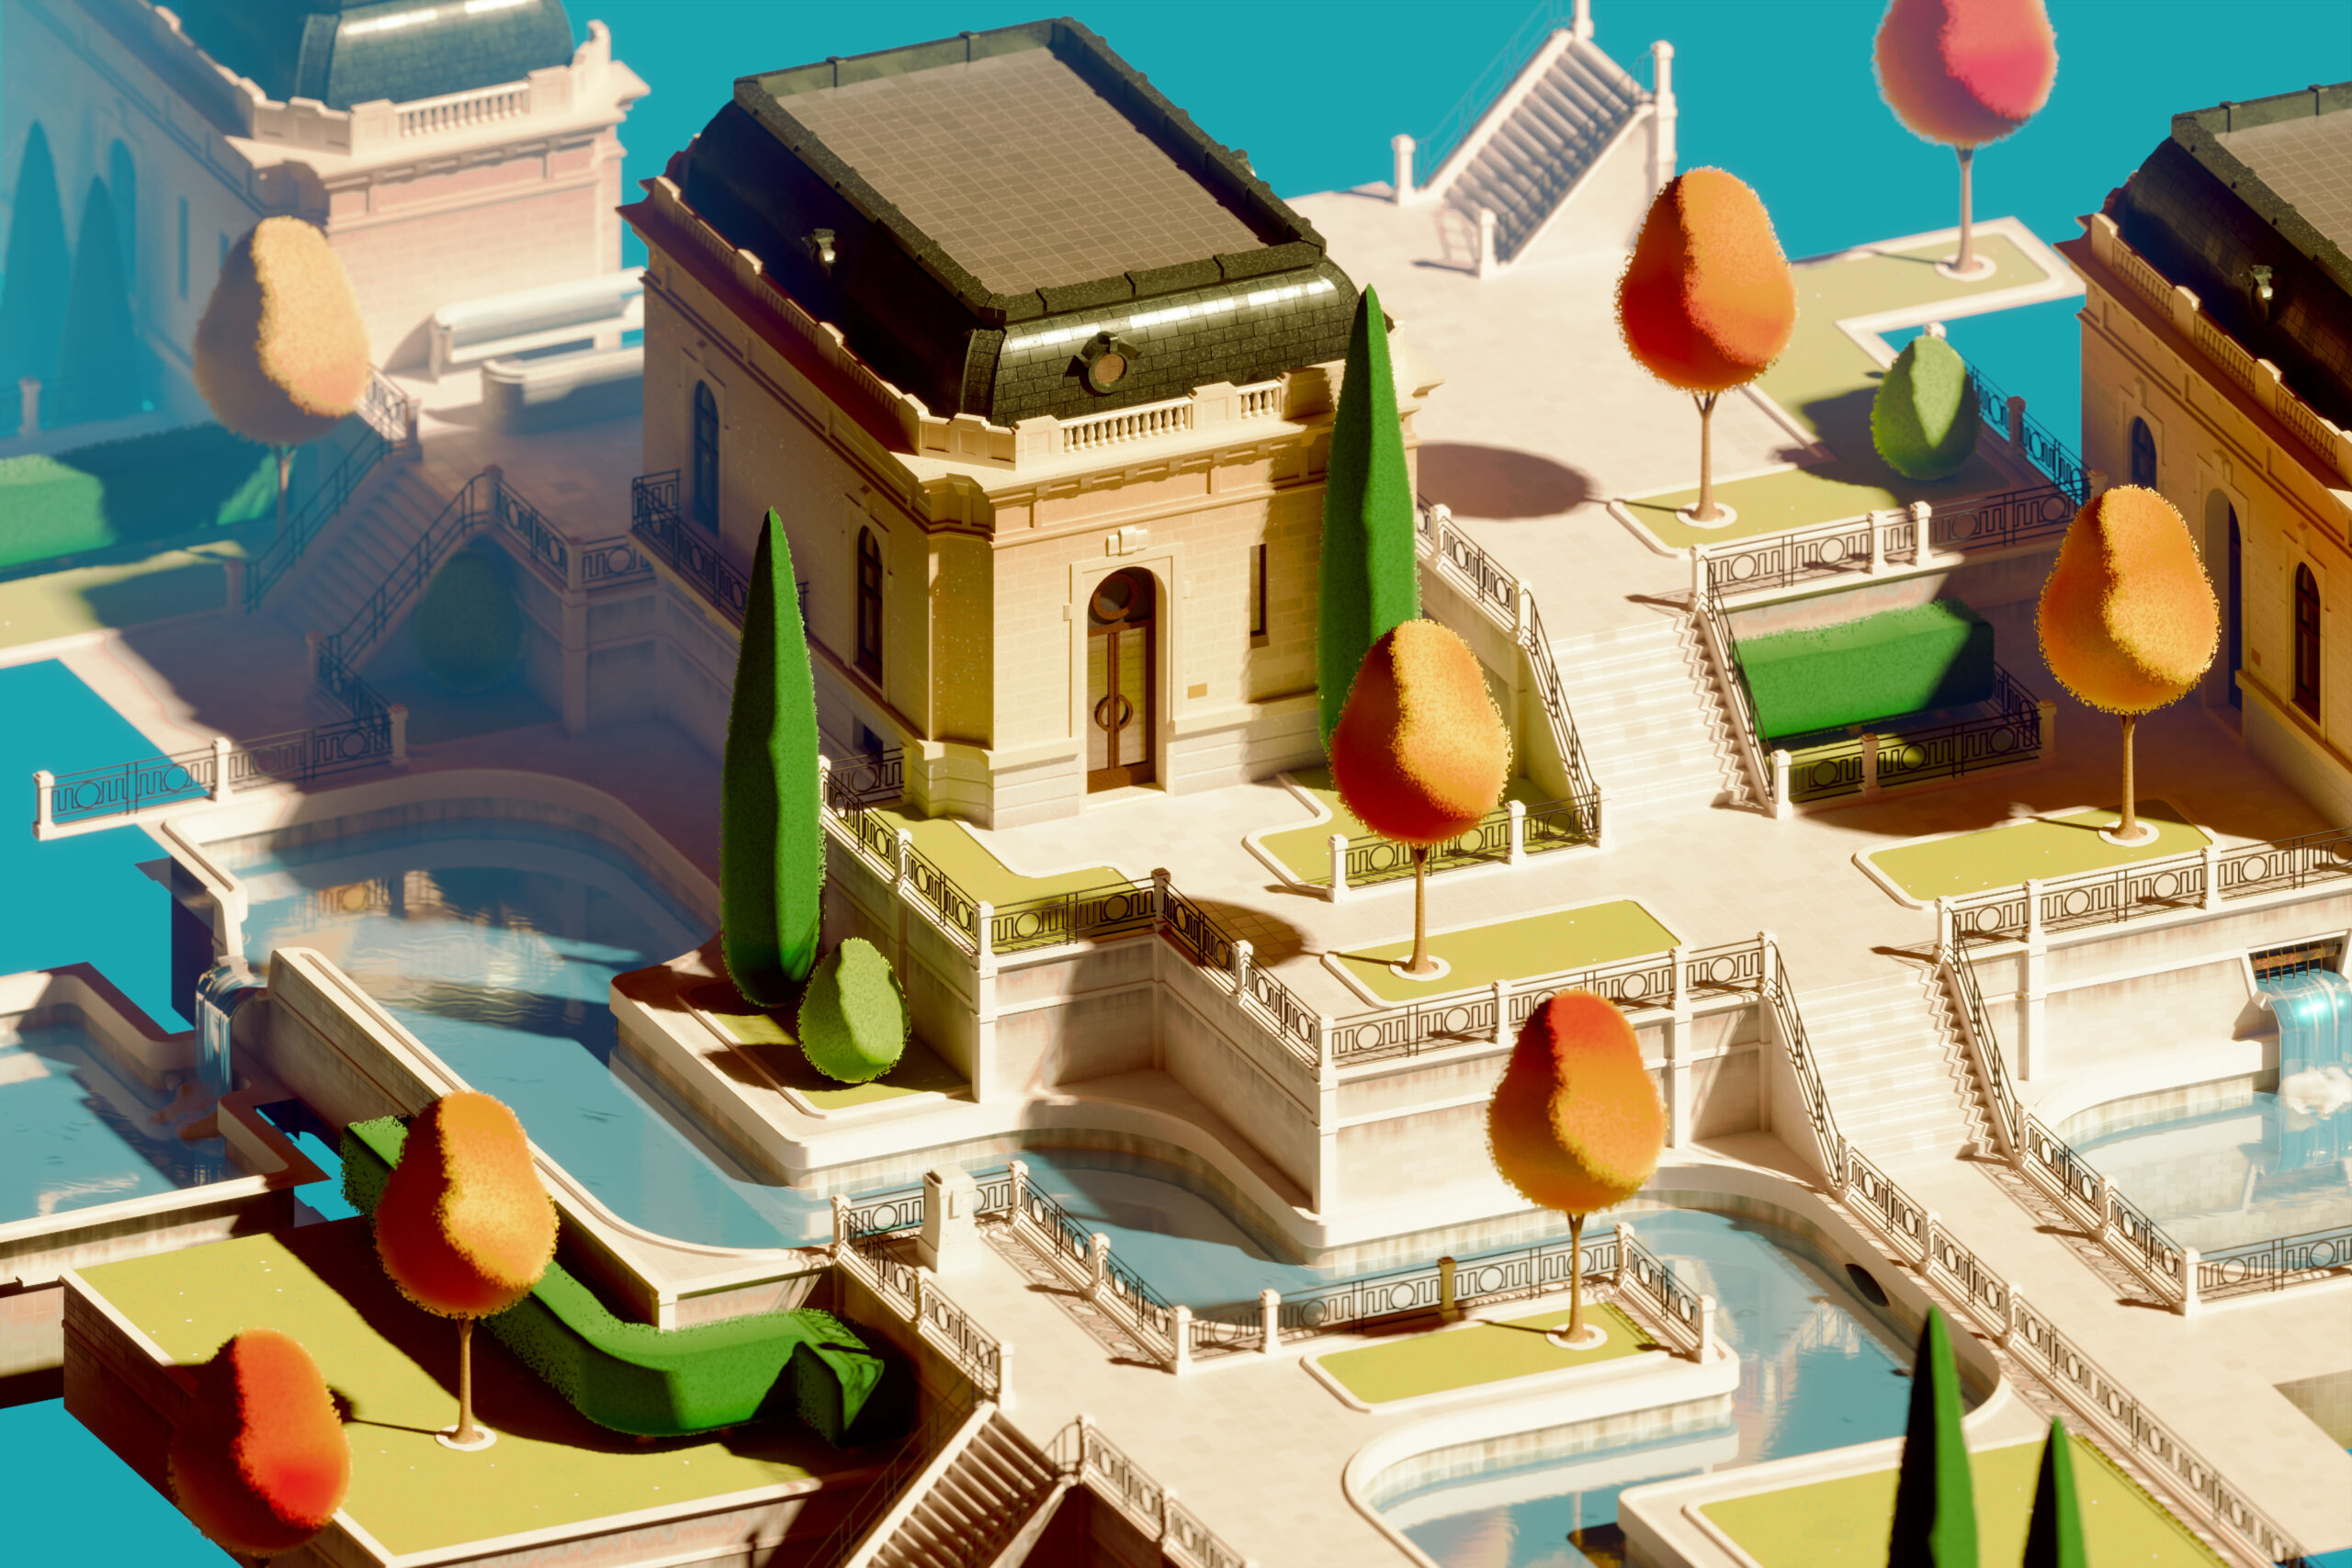
Here's a fourth update to the most recent version of my Parks project in Blender.
I've added and moved a few elements here and there since the last version. The biggest change is a little more under-the-hood, though it is obvious when you compare the images directly; I've re-worked the core of my water shader/material.
It's still not quite where I want it to be, but the ripples look more water-y to me, and it's now a lot simpler in how the effect gets built. It also plays nicer with the waterfall objects, which were looking a little too much like plastic to me in the last iteration.
Since the last version, I also had an opportunity to explore the scene in VR, using my Oculus Meta Quest 2. The scale of things looked mostly okay, but the "small" hedges, which are meant to be about waist-height, are almost as tall as me! So, I'm sort of entertaining the idea of re-working those. And then back to building out the rest of the scene and adding some more park objects to it.
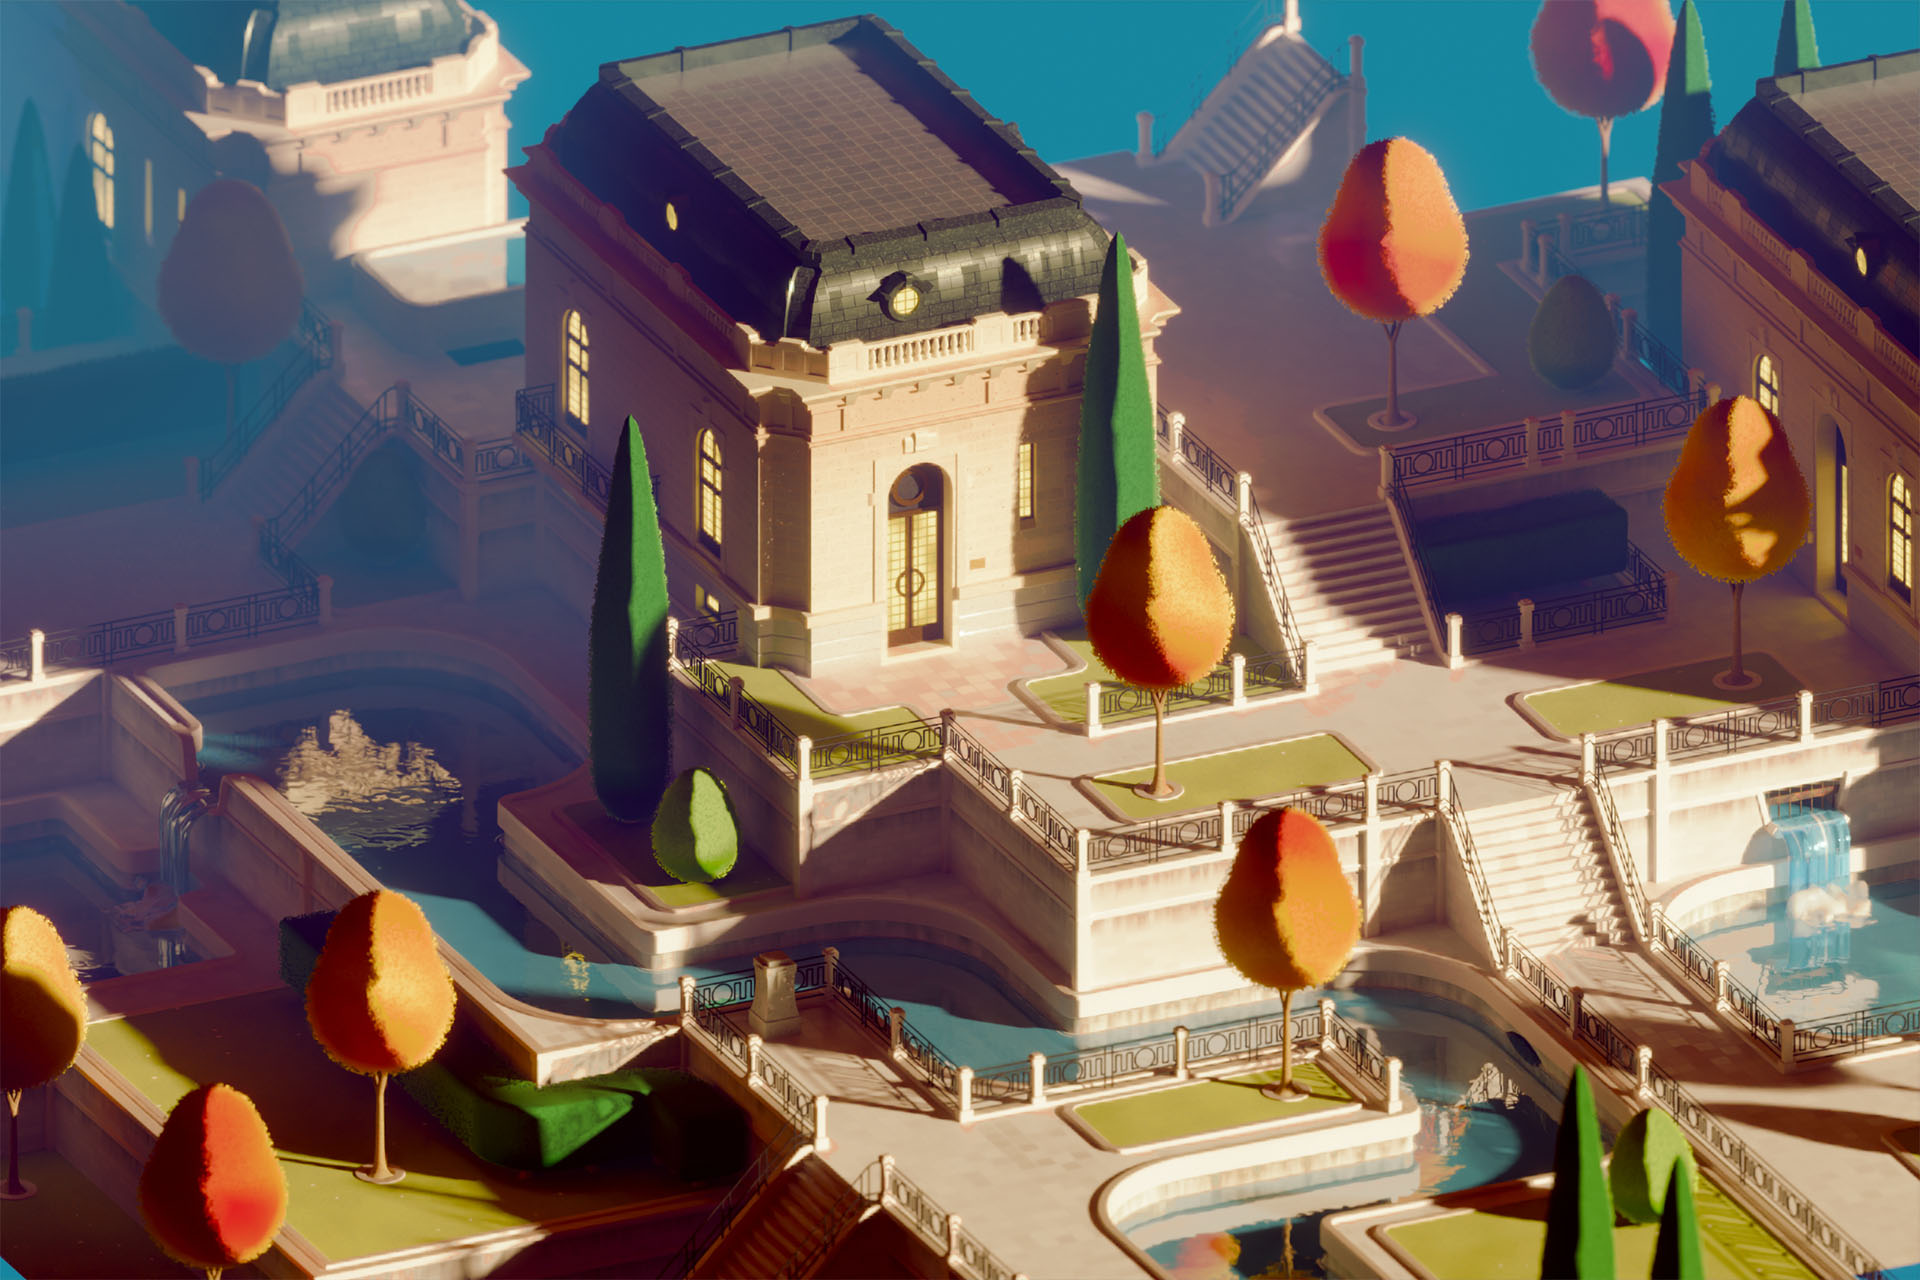
I also did a test render of a different lighting setup that I thought was cool. Check this out:
This is a night/sunset scene, and I can now make all the windows light up with just one click, controlled by a world variable in Blender!
I'm not sure which I like better, honestly. But it's easy to switch between the two setups, so I'll keep plugging away and experimenting. If I end up going with the latter setup as the final, I'll have to tweak the color corrections a bit - there is a lot of odd pink-ish banding in the highlights.
I wasn't happy with how the volumetric material for the waterfall splashes looked, so I re-did those. I also pumped up the red and yellow contrast in the trees, and added some hedges.
I want to make some additional objects, like benches, lights, trash cans, etc. but I'm a bit worried about the can of worms that might open up. I've never done a proper scale test with the parts in this scene - that is, I've never dropped in a 2 meters tall human shape to see how things look in proportion - so I've been reluctant to add objects like that.
Just eyeballing it, things look mostly right. The hedges seem a bit chunky, maybe. Editing the width of them would be a pain, but... now I'm tempted. Maybe something I'll do further down the road.
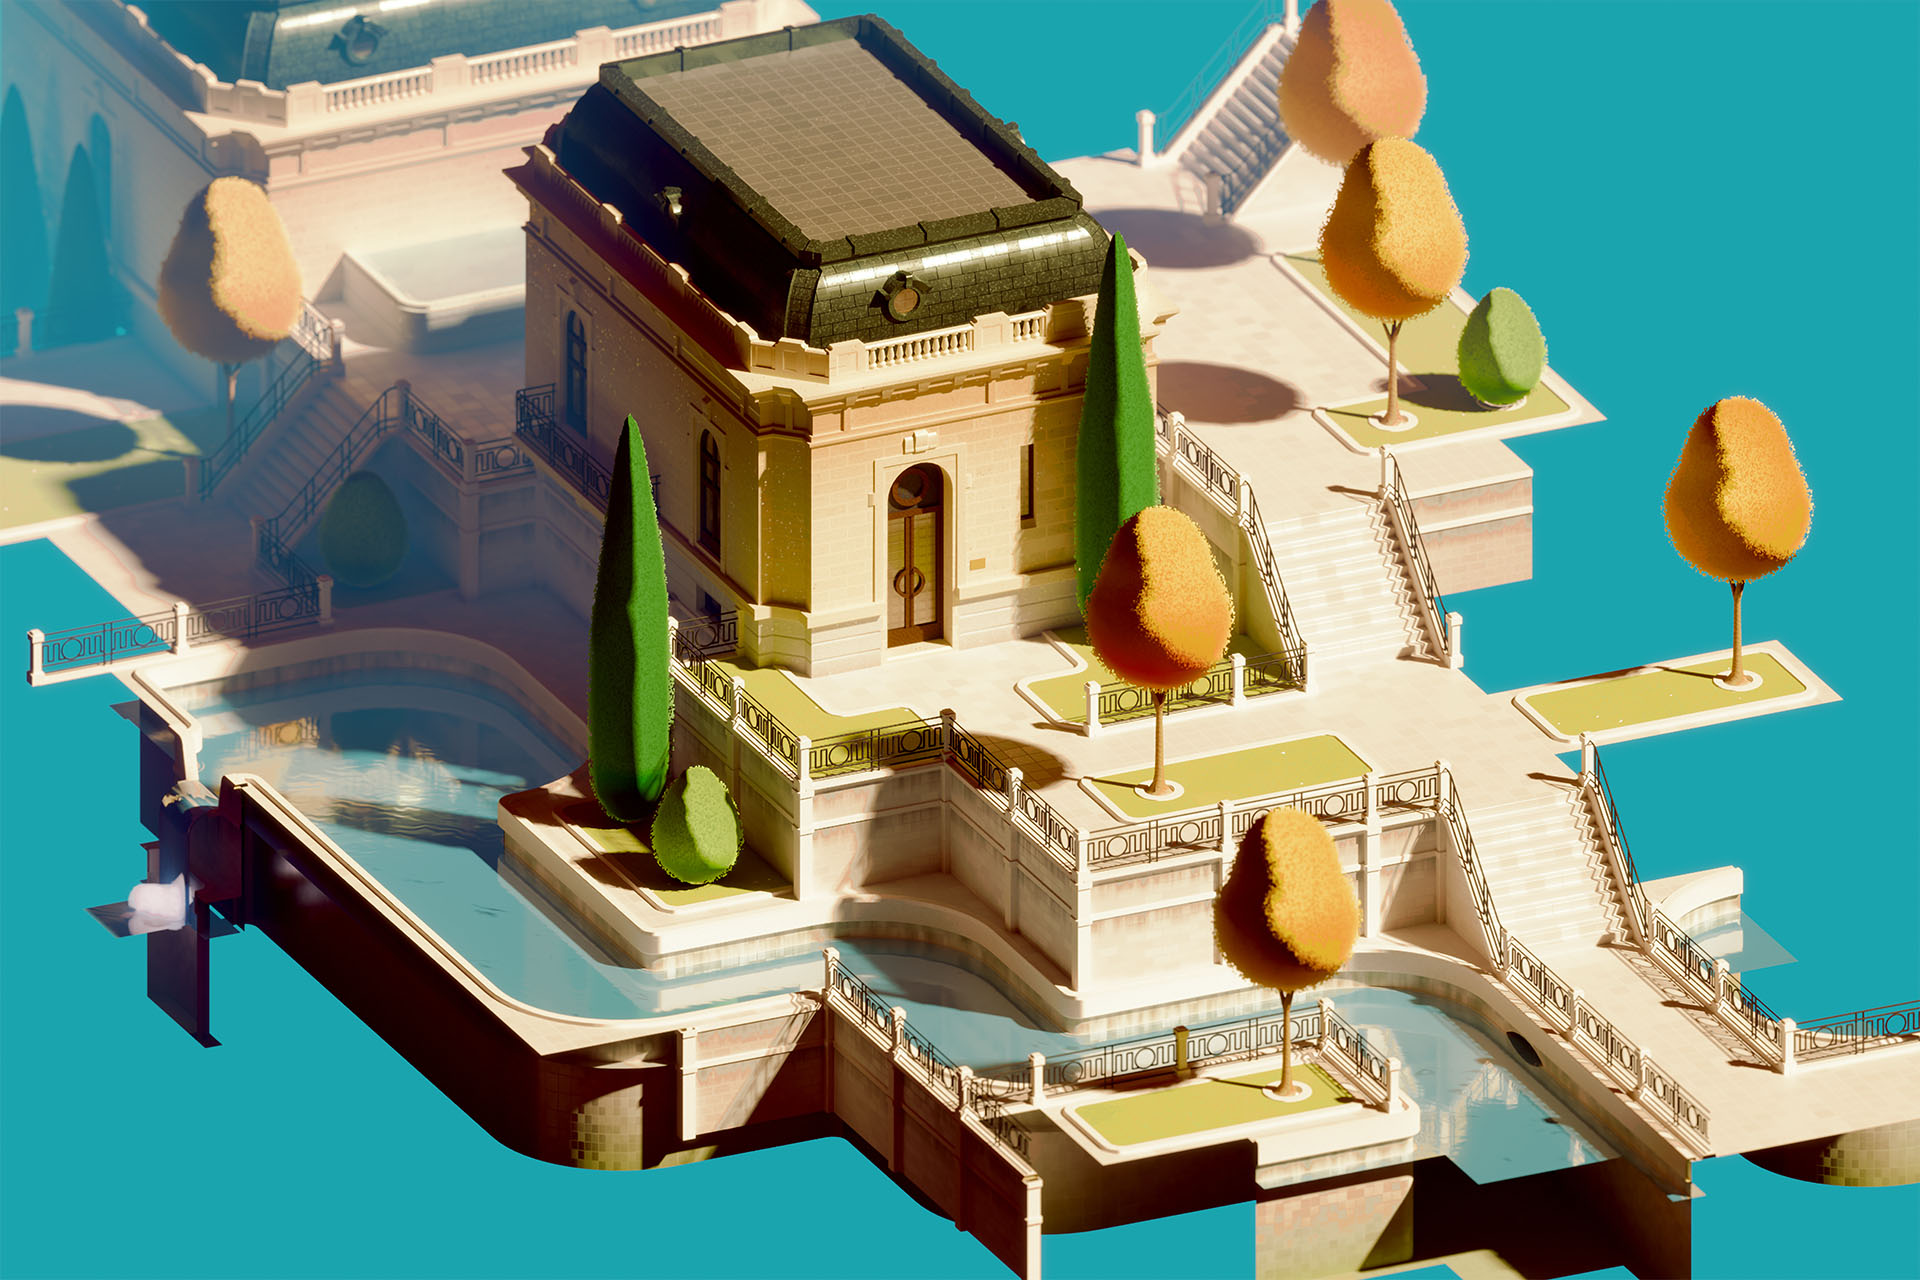
Here's an update to the test render I posted last night!
I've made some changes to the way the park is laid out, mostly on the lower canal level, changed the camera to be isometric, and adjusted a few other things.
One of the bigger changes is the atmospheric effect and coloring, which is all currently being done in Blender's compositor, with color correction, and glare. I don't usually do it that way - I usually do color corrections in Photoshop - so this is sort of an experiment.
More updates to come, as I have time to work on this more!
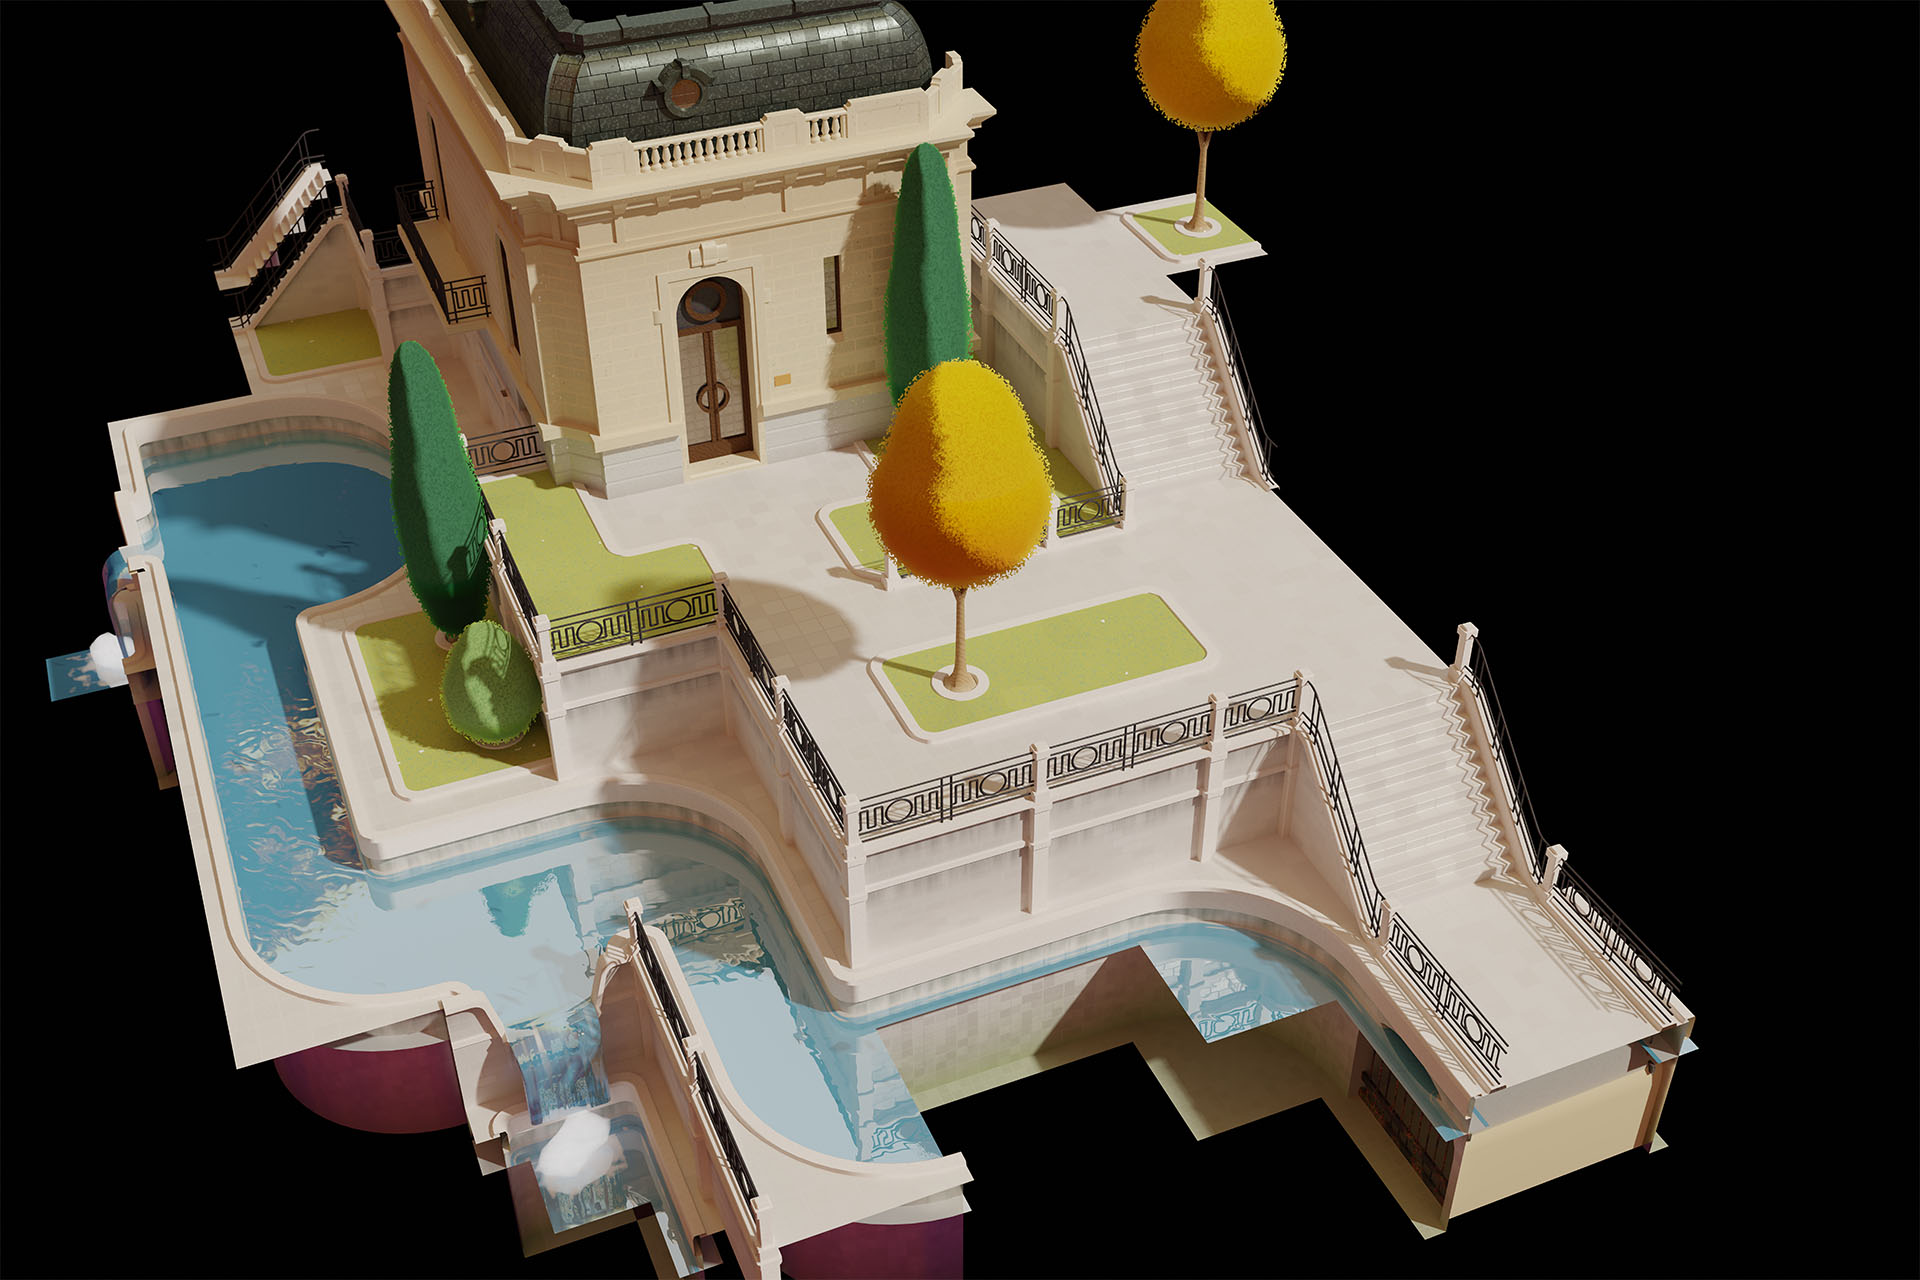
I've been playing around with the pieces I made for the Modular Park renders back in 2016, adding some stuff, editing some others, and trying to just build up a collection of parts to make more pleasant places with. I made this test render today just to see how things are shaping up.
Still some work to do, but I do enjoy making cozy little outdoor spaces with these parts. 🙂
I loaded up Procreate to take a look at something this evening, and a little "what's new" message was waiting for me. I clicked it and, among other things, Procreate has a 3D mode now. Sweet!
Definitely still a 1.0 addition, but I can't wait to add some more painterly effects to my models without having to do a big export/import dance across my computer and iPad Pro. This software is really amazing.
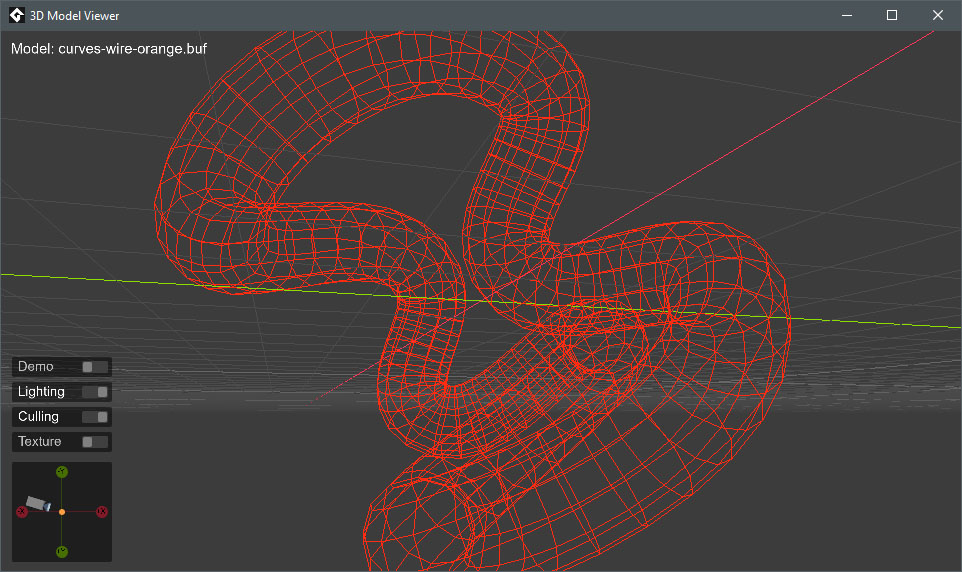
Today, I released the first update to gamemaker-3d-io, a Blender addon I created to help get 3D models from Blender into GameMaker Studio 2.
This update brings some new functionality to the addon: in addition to triangle lists, it can now also export line lists and point lists. Some neat effects can now be achieved!
I also refactored the addon a bit, splitting out the data prep and output-building functions into their own modules. And I cleaned up the export menu to be more organized in a better way.
Get the addon at the link above, or at Github. If you happen to use this addon for your game, be sure to leave me a note and let me know what you think!
It's been out for a few days, but in case you haven't seen it, I've finally updated my addon for Blender, which allows you to output 3D models to GameMaker Studio 2. The latest iteration of the addon will output models to GameMaker's vertex buffer format, so you can load the files natively, without including a bunch of scripts in the game.