I'm always on the fence as to whether or not I should use tile sets for my GameMaker game backgrounds, or if I should just use the objects which draw the background elements to do it instead.
I don't have pictures to share yet, but in my current project, I have a set of images that frame the edge of the play area. They are made up largely to look like natural rock formations, and so it'd be best if they aren't symmetrical left to right.
These graphics are the only part of the game that could realistically utilize tile sets, but I'm stuck as to whether or not I want to put the effort in to convert them to tiles. This scene will never change in the game, and there won't be multiple rooms that use the same tile set - it'll be once and done.
Still, having them as a tile set will make it much easier for me to make sure the patterns in the edge aren't repeated from one side to the other. And I will then let GameMaker handle whether or not to draw them, as opposed to either always drawing them, regardless of whether or not they're in the camera's frame, or rolling my own code to check. And then, on the off chance that I do end up needing to tile another room, I'll have them ready. Hmmm.
Well, I'll return to this soon I suppose. My dev time is just about up for the night, and there's a new season of The Great British Baking Show premiering on Netflix today. TV awaits!
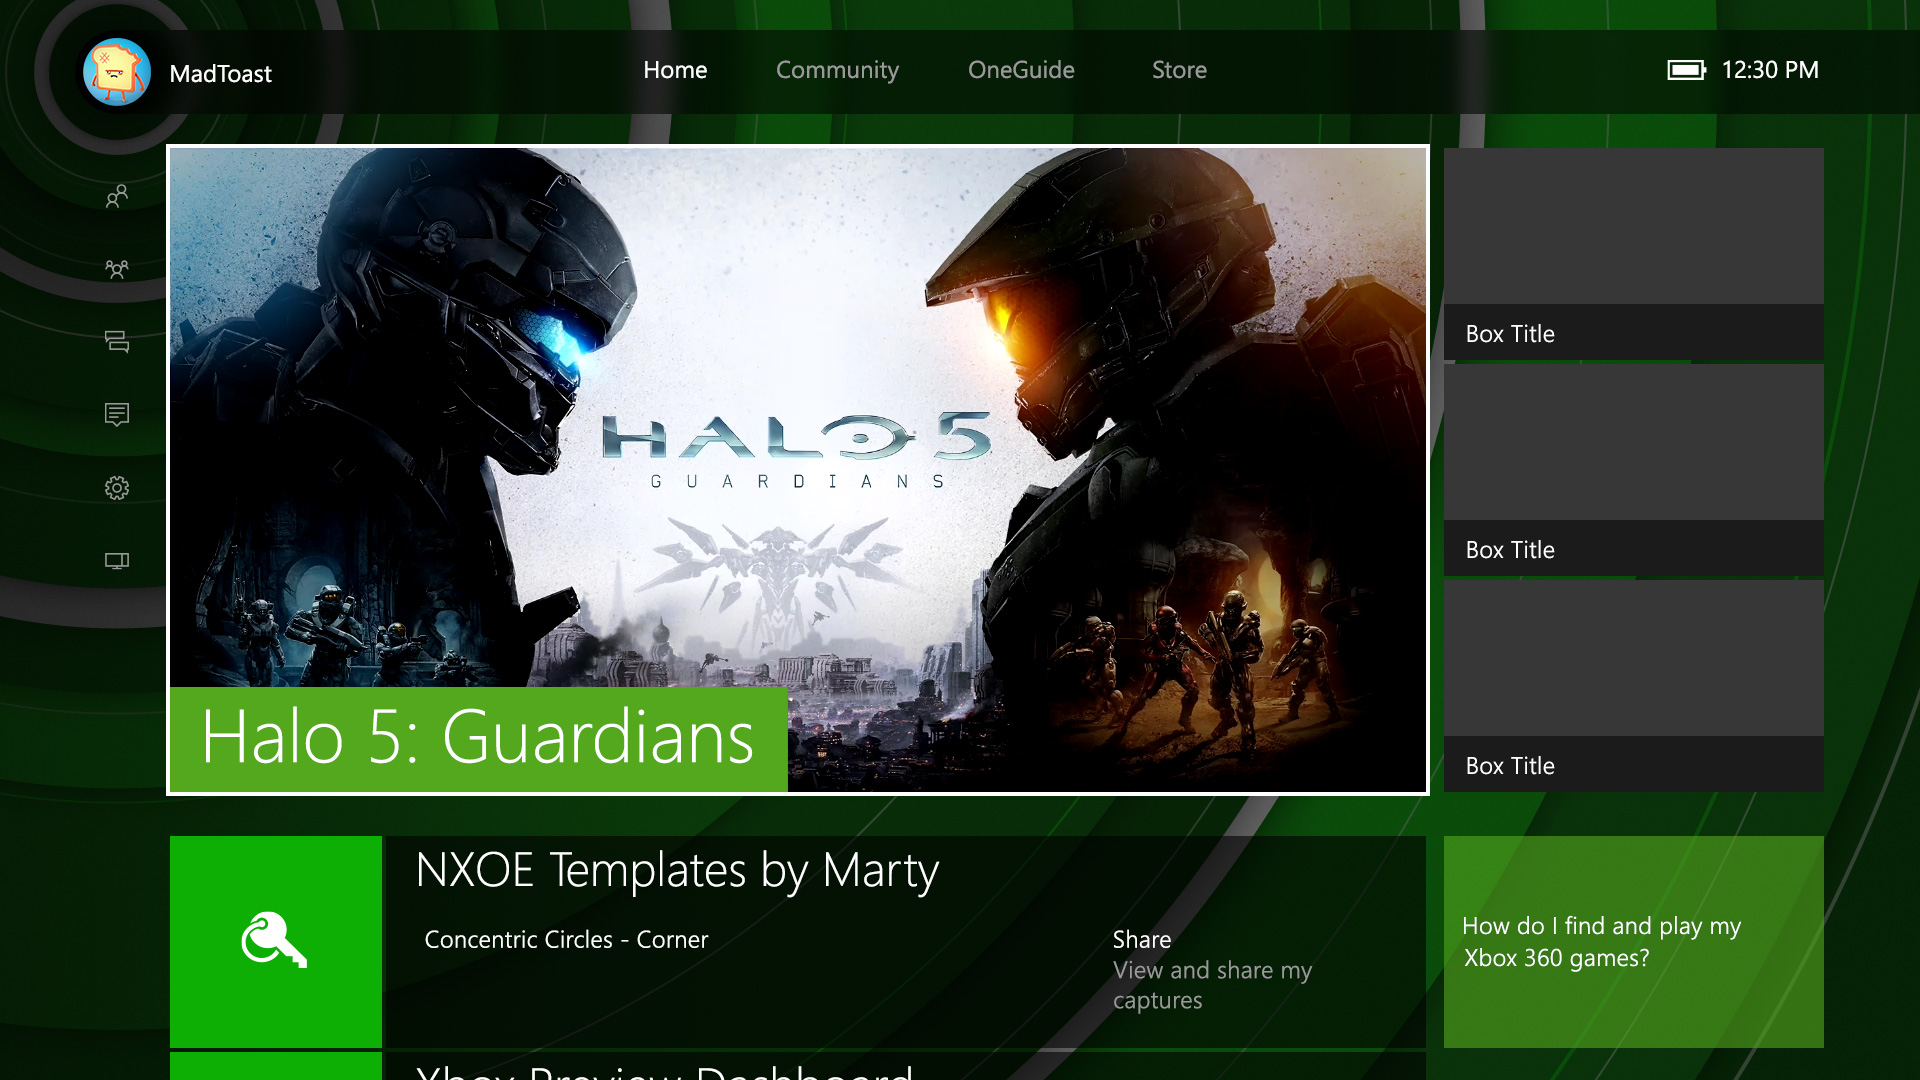
With the New Xbox One Experience right around the corner, I decided to update my collection of "theme" images (basically home screen wallpapers) to work better with the new UI layout. I don't have any of these posted on this site yet, but since it already exists on imgur, I wanted to at least put the link out there for anyone who might happen to be visiting.
Some of you might already know this, but back in September of this year, I ended my job at CytoSport, Inc. to pursue other interests. So far, things have been going well for me, and I have been doing a lot of interesting and challenging contract work. Much of that work has been in Blender, software which, at this point last year I'd barely touched. A lot can change in a year though, and as it happens, Blender is now one of my favorite pieces of software. It has completely replaced my ancient copy of trueSpace for 3D development.
I'm still in the process of learning more about Unity for game-making, but in the meantime, one piece of software which I still like to dabble with now and then is GameMaker. Though I never seem to have enough time for personal game-making as I'd like, I still get a kick out of firing up GameMaker: Studio and trying ideas out.
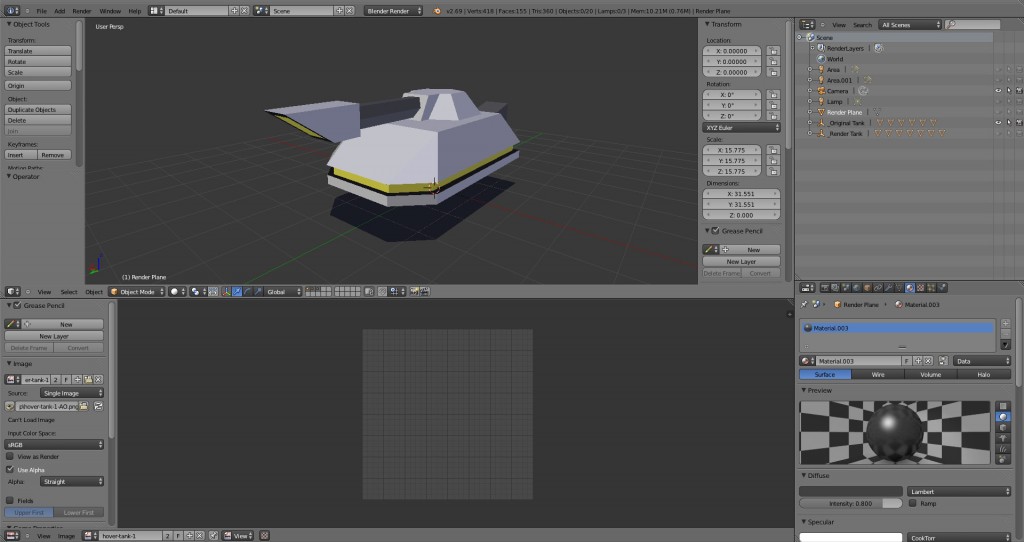
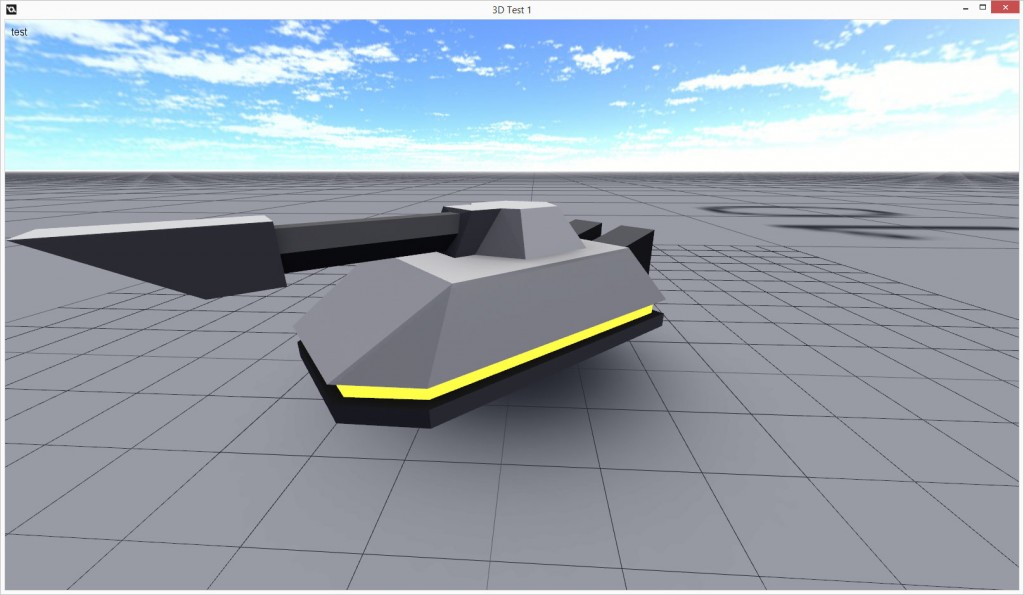
Recently, I've been bungling around with GameMaker's 3D graphics again. I know the program isn't suited for anything particularly grand when it comes to 3D projects, but I like it nonetheless. One issue I kept running into though was getting my 3D models out of Blender and into my game.
Traditionally (even as described in one of my tutorials) this is a somewhat convoluted process. One would have to make a 3D model, save it to a format one of the many 3D programs / scripts people have written over the years would read, and then use one of those to load the model directly into the game, or more often the case, convert the model to a format GameMaker would understand, and then load that into GameMaker in a separate step.
Along the way, all kinds of odd things had to be done, and the software one chose to use had to suit those needs. UV maps had to be flipped. Models needed to be rotated 90 degrees this way or that. Normals were often lost in translation or reversed. I often found that my models wouldn't turn out exactly right - somewhere in the process, the numbers describing the locations of the vertices in my models would get rounded off! Worse still, one had to jump through each of these hoops each time a model needed to be updated or added to the game. Slight revisions to geometry or UV map would take a long time to implement. In short, it was not a lot of fun.
So, with my recent work in Blender, and my lasting interest in GameMaker, I decided there had to be a better way to do all of this. I searched around for examples of export scripts for Blender, and after finding a suitable starting point and reading a little bit about Python, I cobbled together something that works much better than the convoluted mess I described above - I've crafted a nice little export script for exporting 3D objects directly from Blender to GML.
It wasn't a particularly hard project, and I'm sure the script lacks a lot of the finer points that someone who really knows what they are doing might have done, but it works, and I'm happy with it. And I'll have a link up on the site soon.
Basically, this new script will let you select an object in Blender, triangulated or not, and with about two clicks of the mouse, export it as a text file which contains all the GML code needed to create the model in GameMaker. If one wanted the model to exist externally from GameMaker but still in GameMaker's native model format (which is very quick to load), it would then be trivial to save the model and from then on, use the new external file.
A lot of credit for this script is owed to Jeff LaMarche for his work on a script he built for converting Blender models to a suitable format for Objective C/iOS development. I used his script as a template to write my own, and I could not have created this without his as a starting point.
Anyway, I'm going to have to write up a bit more about how to use the script, but I'll have it online soon. I hope that it makes it easier for people to get quality 3D graphics into their games!
I was working on a somewhat complicated image mask of a motocross rider the other day at work. Whenever I work on complicated things like this, I try to save every few minutes to make sure that if Photoshop crashes, I don't lose much of my work. When I was done, I had a short progression of images that showed my progress as I made the mask, and I thought it'd make a neat animation. Check it out:
In case you're not into computer graphics, an image mask is a special bit of extra data attached to a layer of graphics, represented in grayscale, where black represents total transparency, white represents total opacity, and the values in between make up the range from transparent to opaque. Basically, it's a way to tell Photoshop (or other image editors) where you should be able to see through parts of an image. Masking is obviously a very important part of working with computer graphics.
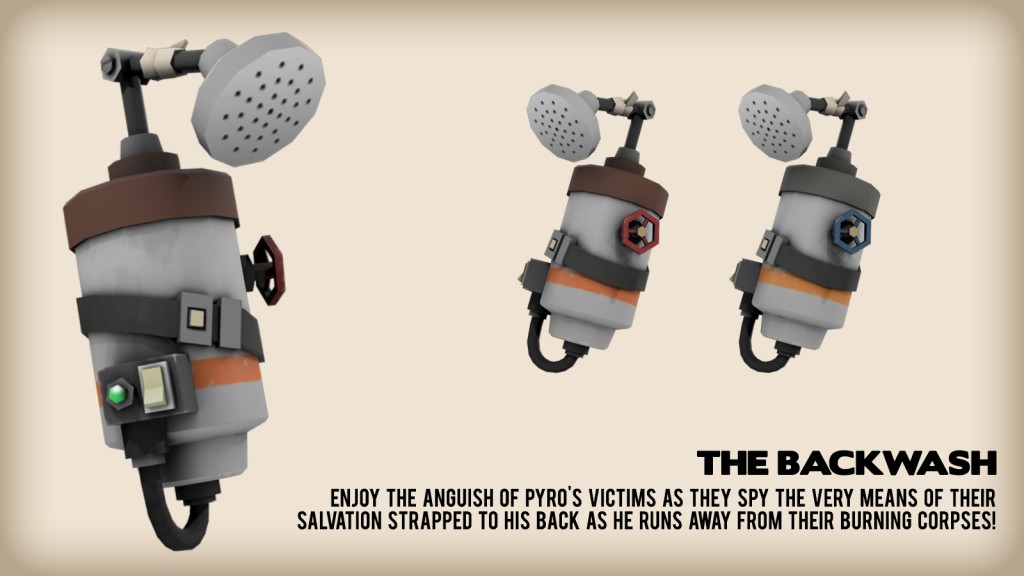
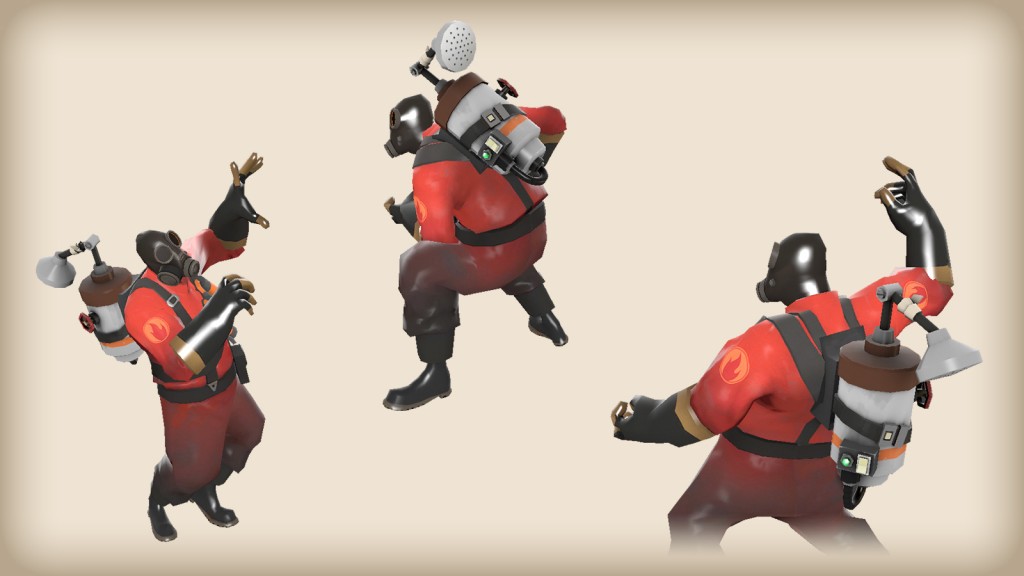
I've recently been dabbling in creating items for Team Fortress 2, via Valve's Steam Workshop feature.
If you've never heard of Workshop, it is a system Valve integrated into Steam where people, outside of the official game development teams, can create assets for use in-game and submit them for community vetting / approval. The respective game's dev team then gets to choose from the crop of community-crafted items to add to their games and usually, to sell as micro-transaction DLC, for which the original creator of the item is compensated.
It's an interesting thing, to say the least. Especially for people like me, who are already interested in creating 3D models and who already play many of the games which participate.
So anyway, I've been trying my hand at making a few items for Team Fortress 2, and so far, so good, I think. As of now, I've created four items, and with each one I feel like I've learned a lot of new stuff about the process, and about being more efficient with the process. So much so that I suspect that I could (and probably should) go back into the original files at some point and update them to include all the things that I have learned. We'll see though.
That's all for now... If you want to check out my Steam Workshop items, check them out here. I'd appreciate an upvote or two!
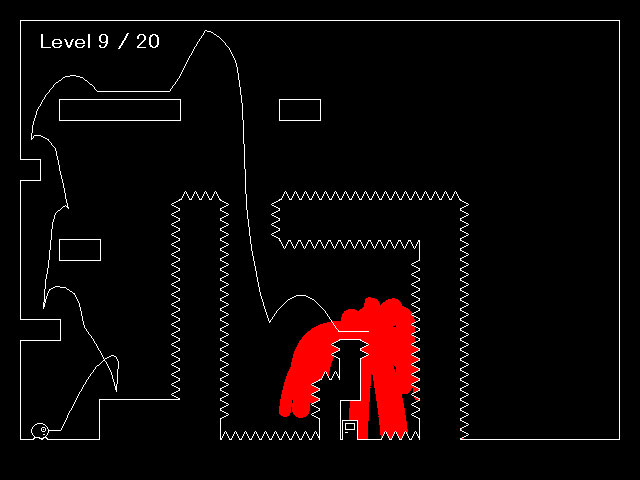
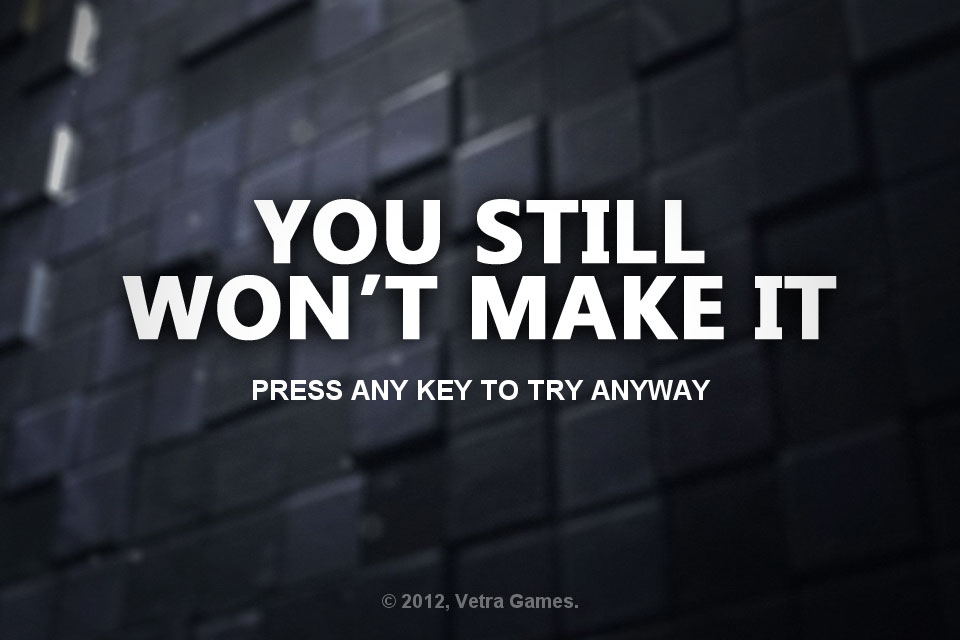
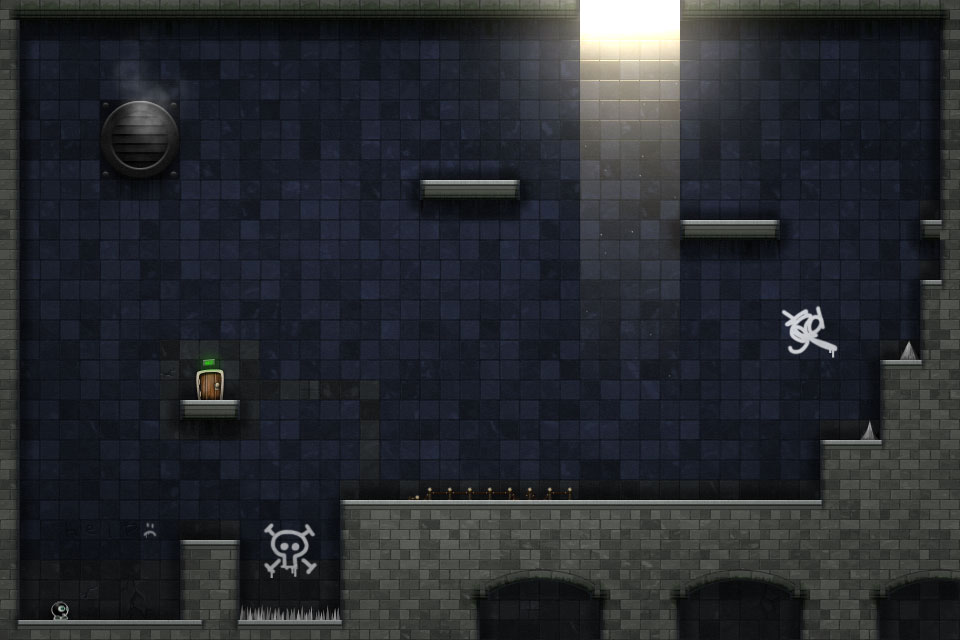
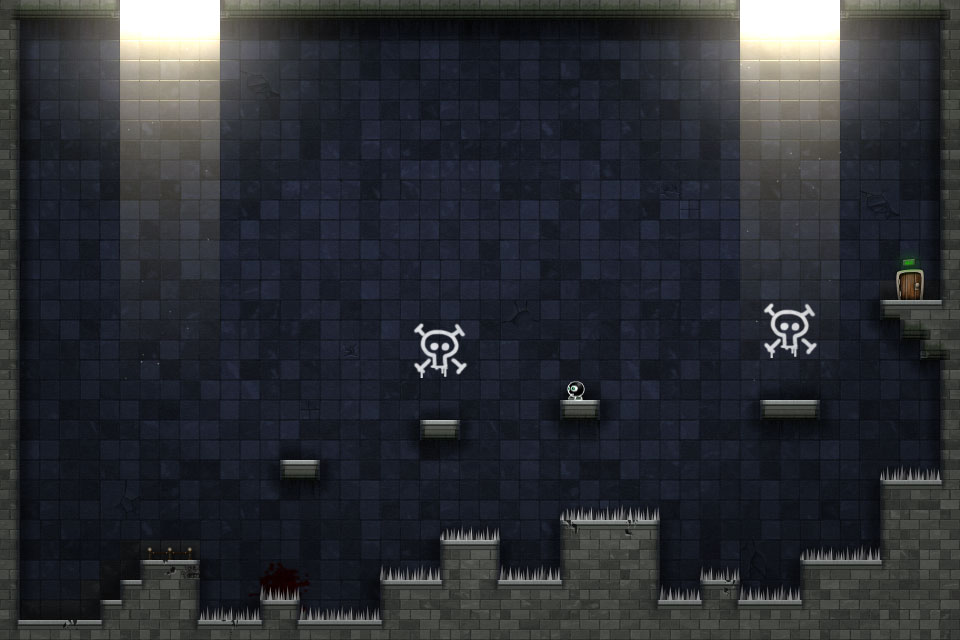
I just wanted to take a moment to share some screens of the game You Still Won't Make It, which I am working on with Vetra Games (Uriel Griffin, Jake Almond, and Jesse Venbrux). Development has been slow at times and fast at others, but it's coming together, and we will hopefully have the game out later this year.
In case you haven't played the original game (You Probably Won't Make It), YSWMI is more or less the same type of game: a skill-based platformer where the player simply needs to navigate the character from start to the finish, through a series of increasingly challenging rooms.
Naturally, I'm in charge of the graphics. And though the project is, graphically, a large departure from the original game, I'm happy to say that it's also a vast improvement. That's not to say the original graphics were bad - they got the job done - but there was a lot of room for some creativity on that front, and so far, I'm very pleased with how it's looking.
This is essentially what the game looked like when I got my hands on it some months ago:
And here are a few screenshots from our sequel, which is a work in progress at this point:
Quite different, eh? But still the same (brutal, fun) game underneath all of that.
Though I'm continuing to develop and add new graphics to it, I just recently finished enough to actually have the game play without a bunch of ugly placeholders everywhere, and that's a great milestone to achieve. We're looking forward to getting this game out later this year, and hopefully many people out there are looking forward to playing it, too!
One of the things I've been doing in the time since my last major blog post was dabbling with rendering some of my Minecraft exploits.
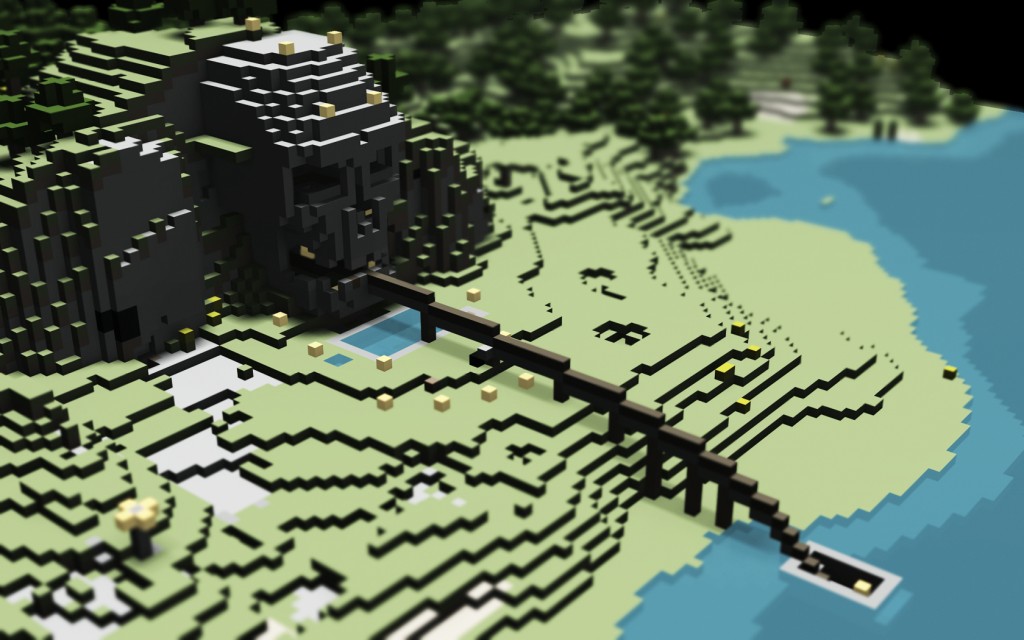
One of my biggest projects in the game (before I started "cheating" with INVedit and MCEdit) was Skull Island. Across a wide expanse of water from my original spawn and home base, I found an island with a large mountain near the water. It could be seen faintly from the water's edge near my spawn, and I thought it'd be a cool project to carve a large skull into the cliff face. After a few weeks of work (not always consistent play, but it did take a while), I was finished. It wasn't the best thing I'd ever seen made in Minecraft, but I liked the result, was proud of my work, and have decided to post the results here, for the curious.
In order to render my Minecraft levels, I first output them to OBJ format using mcobj, which is a great little tool. I used my old 3D standby, trueSpace, to do the actual rendering, and did a little work in Photoshop afterwards for some of them as well.
Here's the final render I did of Skull Island. The depth of field effect, which was part of the original render, gives it a nice little tilt-shift photography effect that I feel is very appropriate for Minecraft. I also did some post-process color work in Photoshop.
That line coming out of the water and going into the skull's mouth is actually my mine cart track that leads back and forth between the two land masses. On the way over to Skull Island, you come flying up a long incline and immediately see the giant skull looking ahead before your cart goes sailing between the front teeth!
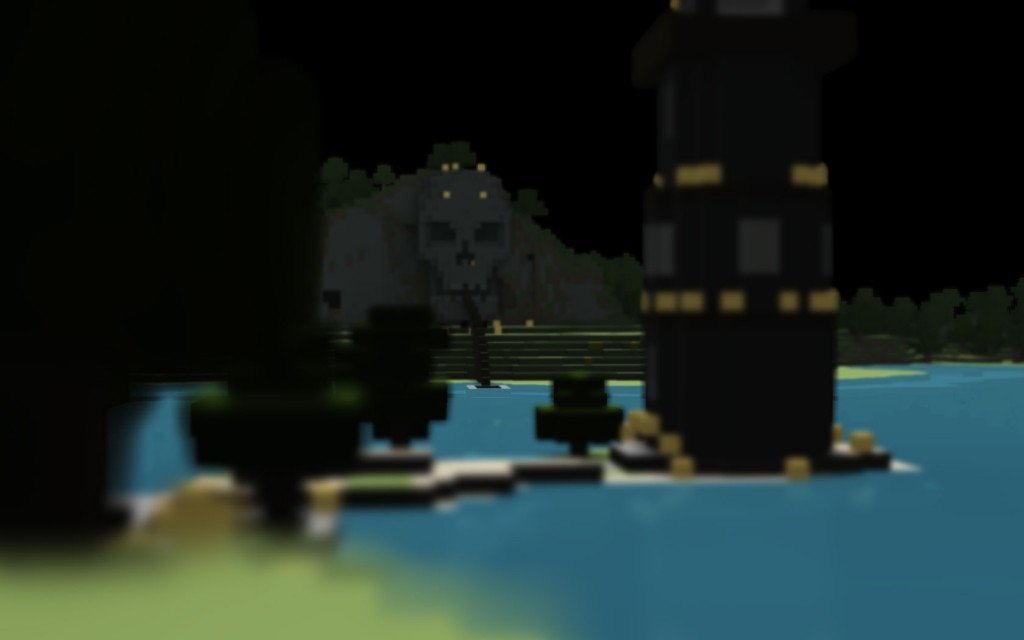
I also did an alternate view from my home base area on the other side of the water. There's no sky output when you export maps from Minecraft using mcobj (and I don't see how there could ever be, really), so I had to make my own. The following two images show the render with and without my faux-Minecraft sky.
I also did a render of a small lake, to test water transparency / reflectivity and depth of field.
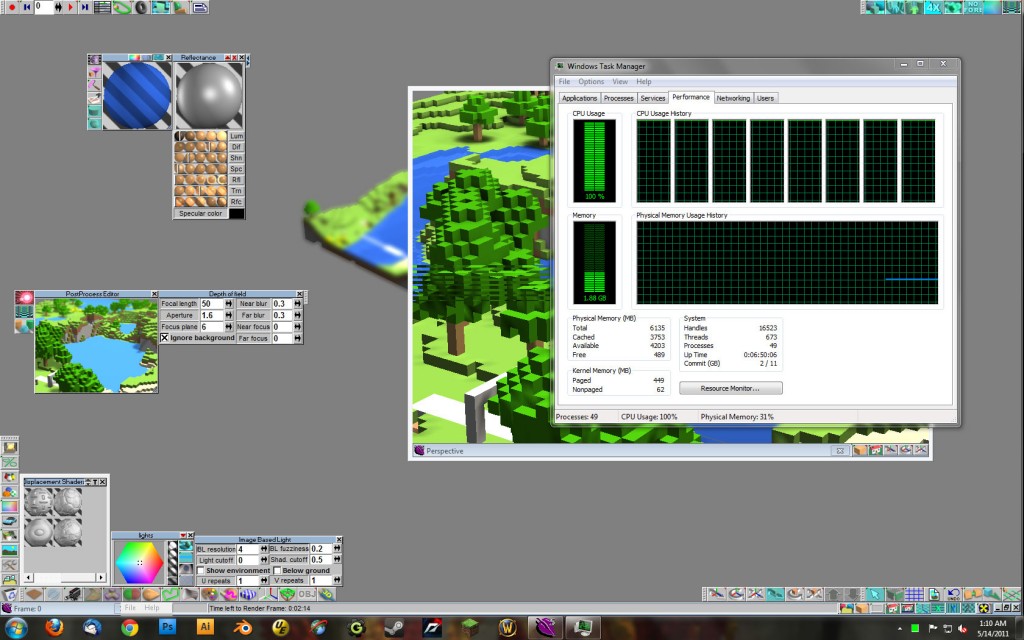
And finally, just for kicks, here's an image of my poor computer trudging through a rendering... the phrase "firing on all cylinders" comes to mind!
If you play Minecraft and you don't mind getting your hands dirty with some simple 3D work, rendering your worlds is a pretty fun way to make the whole experience a little more artful. There's a good sub-reddit for mcobj at r/mcobj, and people have also written up some decent tutorials for creating renders with Blender too, so there are lots of resources out there to help get you started if you're interested in all of this.
Thanks for reading, and if you have any tips, tricks, or other things to share about creating Minecraft renders, be sure to add them in the comments below! And of course, if I create any more interesting renders, I'll be sure to post 'em here on the blog!