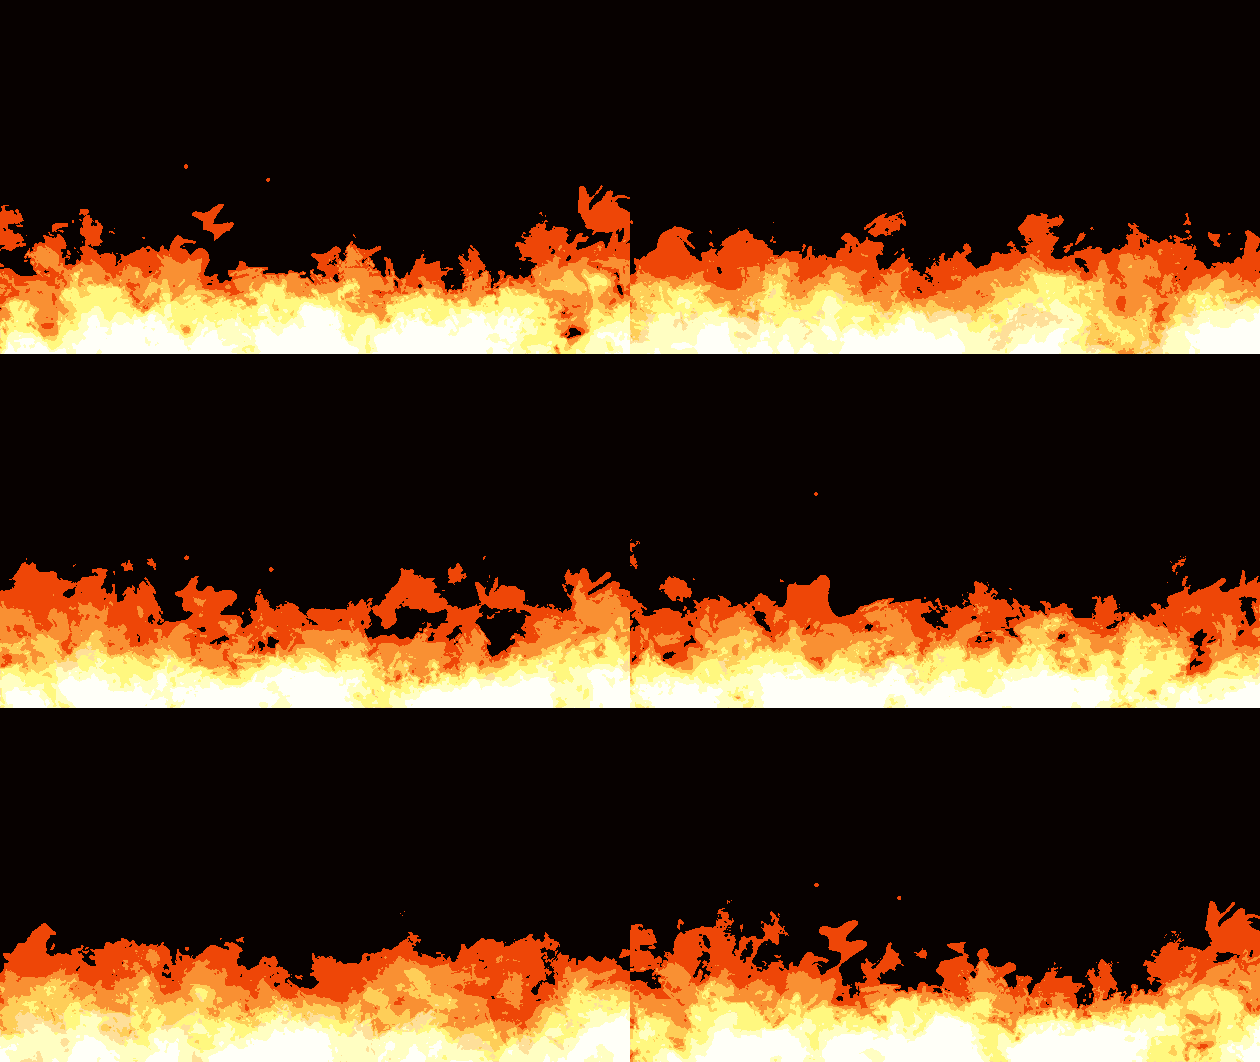
The particle system in GameMaker: Studio is powerful, but when you’re first starting out, it can be a bit confusing, especially for those who have little experience in visual effects. To help people better understand how to utilize particles and create more visually stunning games, I have created this start-to-finish example for creating a realistic fire effect.
I’ve written this as a complete introduction to creating particles in GameMaker: Studio with GML, so it may be a bit wordy. I’ve tried to supplement all the words with a few pictures, where appropriate.
Overview
Fire effects aren’t too hard to create in GameMaker: Studio. For a basic effect, all you need is one particle type that travels up (or outward, depending on the intended viewing angle) and changes color along the way. We have the particle vary a bit in its trajectory, speed, and rotation, and add a blending effect to give it brightness. At the end, we’ll add a second particle for rising sparks/cinders to make things more visually interesting, but it won’t vary too much from the basic fire particle. All that can happen with a handful of small images, a simple setup script, and a test object/test room, so let’s get started.
Step 1: Creating particle images for the flames
First, we’ll need images for our fire particles. I’ve always found it easier to use a series of randomized images for particle effects like this. Even with relatively small images, we can create a nice effect that doesn’t suffer from a patterned look that the built-in particle shapes will create.
I’m using Photoshop to create images, but if you don’t have Photoshop, you can use GIMP, MSPaint, or GameMaker: Studio’s built-in sprite editor. You don’t need anything fancy to create particles for a nice fire effect.
Anyway, open up your graphics program and create a new 64×64 px document. Fill the background with black, set the draw color to white, and get out your drawing tool of choice. If your app supports layers, use them. Draw your particles out by doodling squiggly lines and using filters, as needed, to distort them. The end result should be a variety of different images (I’ve done 7) which vary in shape, sharpness, and contrast.

Make sure that no part of your drawings come up against the edge of your document, as this can be noticeable in the final effect.
For my particles, I started with a basic airbrush/pencil drawing, and then applied distortion with the wave, ripple, and twirl filters. You can do whatever you like here, depending on how you want the fire effect to look. I definitely recommend trying out some different particle shapes so your effect fits the rest of the graphics in your game. When you’re done, save all your images as separate documents and let’s move on to GameMaker!
Step 2: Import and set up the fire particle sprite
If you haven’t already, launch GameMaker, create a new sprite, and name it “spr_fire“. You can name your resources however you want, but it’ll be easier to follow the rest of the example if you use the same names as I have. You can see what my resource tree looks like below.
Click the ‘Load Sprite’ button and select all of your particle images to add them to a single sprite. If you created your sprites in GameMaker: Studio itself, you won’t need to do this step.
Click the ‘Center’ button to center the origin to 32, 32. You can offset the origin of your sprites for some interesting effects, but for this effect we want the particles to rotate from the center, so we’ll stick with that. Close the Sprite Properties window (make sure you press the ‘OK’ button, and not the red ‘X’!).
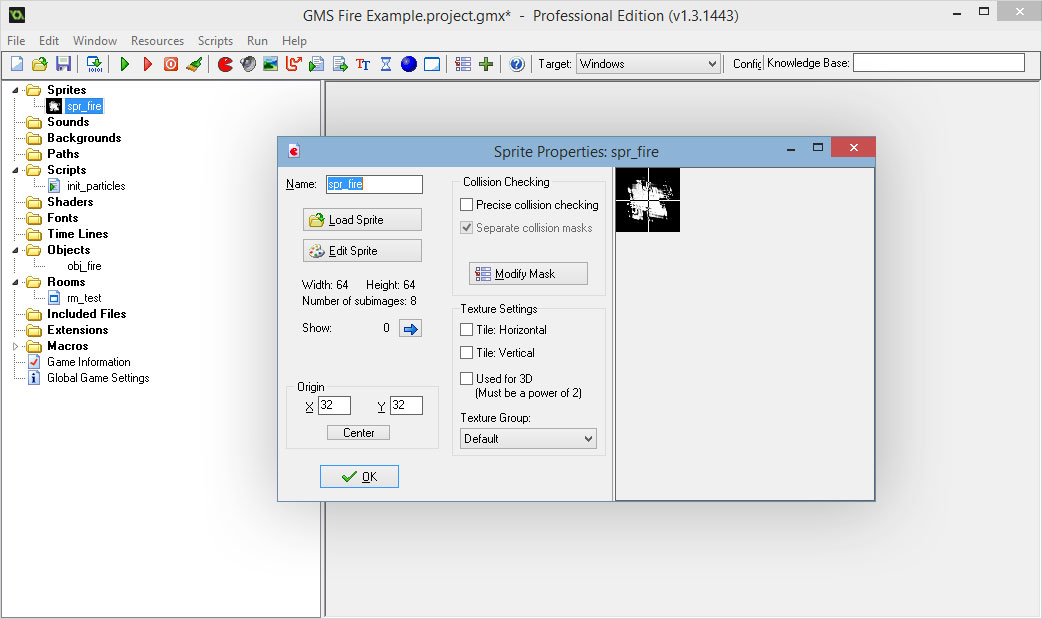
It doesn’t look much like fire yet, but once we add some code, things will take shape quickly.
Step 3: Create the particle system
Your game programming philosophies may differ from mine, but I like to make all my particle effects global. Doing this allows me to easily access them from any object or script in the game that needs them. Additionally, I like to load particle systems in a script which runs once at the game start.
Create a new script, name it “init_particles“, and let’s write some GML!
The first thing we should do is create the particle system in which the fire particles will exist. This is also a great time to set the depth of the system (the draw depth for any particles drawn inside the system), so we’ll do that too. Add the following code to your script:
global.partsys_fire = part_system_create();
part_system_depth(global.partsys_fire,0);
I used a depth of 0 because I have nothing else drawing in the scene, so it doesn’t matter at what depth my particles draw. If I add anything else to this project later, I’ll come back to this script and change the depth appropriately. There are other parameters you can set for your particle system as well – be sure to check the Game Maker manual out for more information.
Step 4: Coding the fire particles
Once you’ve got your particle system in place, you’re ready to create the particles themselves. Let’s add some GML to create the fire particle, and then define how the they’ll look:
global.part_fire = part_type_create();
part_type_sprite(global.part_fire,spr_fire,0,0,1);
part_type_size(global.part_fire,1.5,3,-.05,0);
part_type_orientation(global.part_fire,0,360,2,0,0);
part_type_color2(global.part_fire,c_orange,c_red);
part_type_alpha3(global.part_fire,1,1,0);
part_type_blend(global.part_fire,1);
Before we continue, let’s run through these functions to explain why they’re set the way they are.
part_type_sprite tells GameMaker that we want the new particle to use a sprite to draw, tell it not to animate the sprite, not to stretch, and that we want the image to be random. The random image flag will tell the engine to use a random image from the stack of sprites we loaded whenever a new particle is created. This is good for generating naturally random systems, like fire.
part_type_size specifies the range of sizes the flame particles will be drawn, as well as a slight decrease in size over time. You can adjust the wiggle value to add a shimmery look to your flames, but I like the effect better without it.
part_type_orientation makes our particles start at a random rotation, and continue rotating little each step, which can help the top end of the flames seem like they are curling upward.
part_type_color2 sets the colors of the particle from creation to destruction. I chose to use the two-value version for color because I wanted the flames to have a warm color at the start, and then turn into a darker red tail as they flicker out. You can change this to easily create all sorts of different colored flames.
part_type_alpha3 is similar to the particle color settings. The three-value variant lets us give each particle a start, middle, and final value; we start at full opacity, don’t change at mid-life, and then decline to fully transparent just before the particle is destroyed. This gives the flames a nice soft finish, but if you prefer something more harsh, you can try changing the last value to something closer to 1, or just using part_type_alpha1 and not changing the alpha at all.
part_type_blend tells the particle to draw in additive blend mode. This makes the particles draw so that lighter values are opaque, darker values are transparent, and overlapping areas will blend brighter. It will help make all the particles blend together and dance around as if they were a single body of flame, and not a collection of small pieces.
Step 5: Adding movement
Let’s add some more code to make the particles move. This is a critical element of any fire effect; without movement, it will look more like lava. Continue by adding the following code:
part_type_direction(global.part_fire,85,95,0,0);
part_type_speed(global.part_fire,2,10,-.1,0);
part_type_speed works similarly the built-in <strong>speed</strong> variable in normal objects in GameMaker, and allows us to set the initial speed range of the particle. We also set an amount to subtract from the speed over time, which will help keep the fire from flying too far off from the starting point, and will build up a nice solid base. You can also add wiggle if it suits you, but I prefer not to.
part_type_direction is set to a range of 85 – 95, which will make the particles all move in a direction between 85 and 95 degrees (90 degrees is straight up, so the range covers straight up,+/- 5 degrees). We’re not going to make the direction change over time or wiggle as they rotate.
For other types of particles, it would probably be a good idea to set the gravity at this point, but our fire effect doesn’t need it.
Step 6: The life and death of a particle
The final step in crafting our fire particles is to determine how long each individual particle should live – that is, how long in steps, from start to finish, a particle should be active in the game. Add the following code to your script:
part_type_life(global.part_fire,25,35);part_type_life is a powerful function and can vastly change the way your effect looks and how well it runs. You’ll usually have to do a balancing act between lifespan and speed to achieve the right scale for your effect.
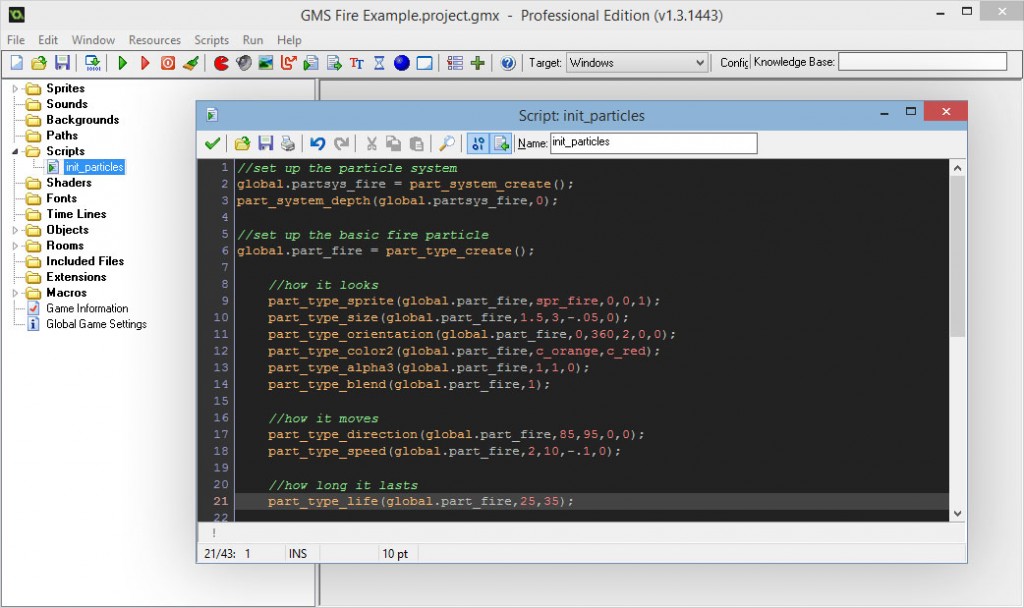
There are a few other functions for particle behavior in life and death, but we’ll only use this one for our fire effect. And again, refer to the GameMaker manual to learn more about the stuff I’m leaving out here!
Step 7: Enter the Emitter
We’re almost there! All that remains is to set up the emitter, the thing that spits out your particles inside the game. Create a new object and name it “obj_fire“, then add a new Create Event to the events list, and drop in an Execute Code block. Double click it to open up the code editor window and get ready to dive back into GML. First, let’s call the script we just wrote to initialize our particle system using the following code:
init_particles();Next, let’s add a new particle emitter, link it up to the global system made in the script, and give it a region in the room:
my_emitter = part_emitter_create(global.partsys_fire);
part_emitter_region(global.partsys_fire,my_emitter,-50,850,450,500,ps_shape_rectangle,ps_distr_linear);
What we’ve done here is create a new particle emitter in our global particle system, told it in what area it should create particles, what shape the particle emitter should be, and how the particles should be distributed within that shape.
Now all we need to do is have the object actually create the particles while the game is running. Add a new Step Event to the object, drop an Execute Code block into the event, and double click it to open the code editor window again. Add the following line of code:
part_emitter_burst(global.partsys_fire,my_emitter,global.part_fire,10);part_emitter_burst will create the specified number of particles with the specified emitter every time it’s called, so if we place it in the step event with 10 particles specified, it will create that many fire particles each step. Alternatively, you could use part_emitter_stream in the Create Event and skip out on adding anything to the Step Event, but that will only allow us to create one type of particle from the emitter, and the effect will look better if we add more. But we’ll get to that in a moment.
Add a new room to the game and change the background color to black, the room speed to 60, and the room size to 800 wide and 450 high (to fit our emitter range). Drop your particle object (obj_fire) into the room, save your project, and run the game! You should see something similar to this:
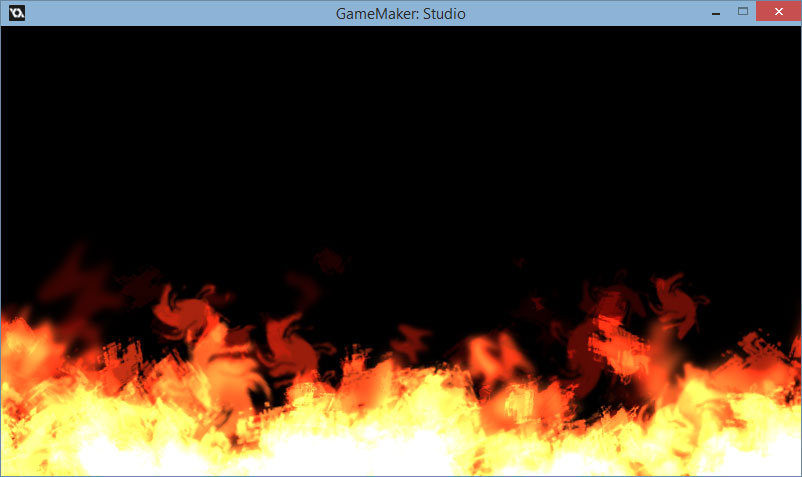
Looks pretty good! But let’s add a little more to the effect to really put it over the top.
Step 8: More Particles!
Although the fire effect we’ve made thus far looks good, I think it could use a little bit more. And one more particle for sparks/cinders flying out of our fire should do the trick.
Let’s add a new sprite to the project that has three sub images, one with a glowing dot in the center, one with a slightly offset glowing dot, and one with the dot at the farthest edge of the sprite (without clipping anything). Call it “spr_cinder“.

Next, open up your init_particles script again, and let’s add the following code below everything else:
global.part_cinder = part_type_create();
part_type_sprite(global.part_cinder,spr_cinder,0,0,1);
part_type_size(global.part_cinder,.5,.75,-.001,0);
part_type_orientation(global.part_cinder,0,360,.05,0,0);
part_type_color2(global.part_cinder,c_orange,c_red);
part_type_alpha3(global.part_cinder,1,1,0);
part_type_blend(global.part_cinder,1);
part_type_direction(global.part_cinder,85,125,.01,.01);
part_type_speed(global.part_cinder,6,8,0,0);
part_type_life(global.part_cinder,45,75);
Finally, let’s go back to obj_fire‘s Step Event and edit the code there as well. Add this to the end:
part_emitter_burst(global.partsys_fire,my_emitter,global.part_cinder,-5);This time we’ve set the particle count to -5, which will give the emitter a 1 in 5 chance each step to produce this type of particle.
We’re ready to run the game again now – save your project again and fire it up!
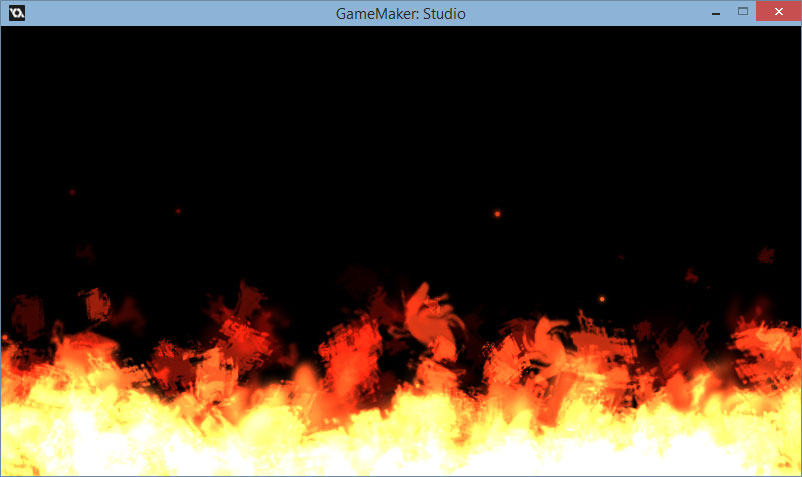
Your project should look like this. The added effects are subtle, but they look awesome to me!
If you’re still feeling a little green when particles are concerned, try tweaking the values of the code we’ve written above. There are many interesting effects that you can make without any drastic changes to the code, and it’s a great way to learn how each of the flags for the particle functions can affect the system. Try it out using difference images as well!
You can download the project files for this tutorial below. This example has been updated to GameMaker: Studio from its original form, so all you have to do is import this single file via the File > Import Project option in GameMaker: Studio. Happy coding!
17 Comments
Wow, looks great, I never considered myself much of an artist on the computer. But the way you explained it, it almost seems like cheating! great tutorial
Hey, thanks Joe! Glad I could help remove some of the mystery of creating a nice little fire effect!
Holy Crap!! Works Great!! Perfect for what I need it for!!
Thanx!
Thanks, glad you like it!
Are there any more awesome effects that you do?
I’ve done some for games, but not any others that I have examples for, currently. I hope to get more up someday – I’ve just been very busy with other things lately, and haven’t had time. It’s always on my mind though!
thanks for amazin fire script . but im problem whit it . i can not put into the torch because of i cant put anywhere……can you help me ? please…. THanks
What are you trying to do, and what seems to be going wrong? More information would be helpful! :)
Is there another way to call the first code we created? In GM Studio the init_particles (); doesn’t work.
To be honest, I haven’t played with particles much in Studio yet, but I will eventually, and I will update the examples accordingly. Sorry about that!
I had the same problem, but realize the solution. Init_particles is the name of the script he created. Put whatever you named the script there instead.
Also worth noting since you mentioned studio, this all ran perfectly in studio as well.
The flames look great, but why do they show against black but not against white? That’s a pretty severe limitation.
Figured it out. It’s the additive blending. The obvious fix (turn off additive blending) makes the effect a lot less pretty. Still not sure how to solve that. Suggestions appreciated.
Sorry for the extremely late reply here, but the problem is that the additive blending is what makes the fire particles bleed into each other in the first place. There’s no easy way that I know of to get this effect while also achieving the same level of glow / color you see here. In my opinion, it’s a pretty small caveat that it has to be on a non-white background to be seen properly.
Very Use fulllllllllllllll
someone helps me how to save the gif of this work i made several versions in different colors but i don’t know how to save it as gif
1 Trackback or Pingback